Introduction
Workshop overview
Your workshop facilitators will take care to bring you up to speed before you are tasked with working on the labs. Therefore, your day starts with a few introductory presentations to make sure everybody has the right level of understanding for the actual hands-on tasks in the second part.
Part 1: Presentations
You should have seen a delivery of the following presentations:
- Introduction of the team, some words about logistics
- Overview of the AWS AI/ML offering
- Overview of Amazon Connect
- Architecture of the labs you’ll be working on today
Part 2: Hands-on labs (subject of this site)
The main part of this workshop is for you to get hands-on with AWS services. We have prepared a number of labs that you can run through. Since we want to make it interesting for both not-so-experienced participants and experienced ones, we have prepared two paths, an exploration path and a deep dive path. The foundation for both paths is lab 0, then you choose between labs 1 - 3 for the exploration path, and labs 4 - 6 for the deep dive path.
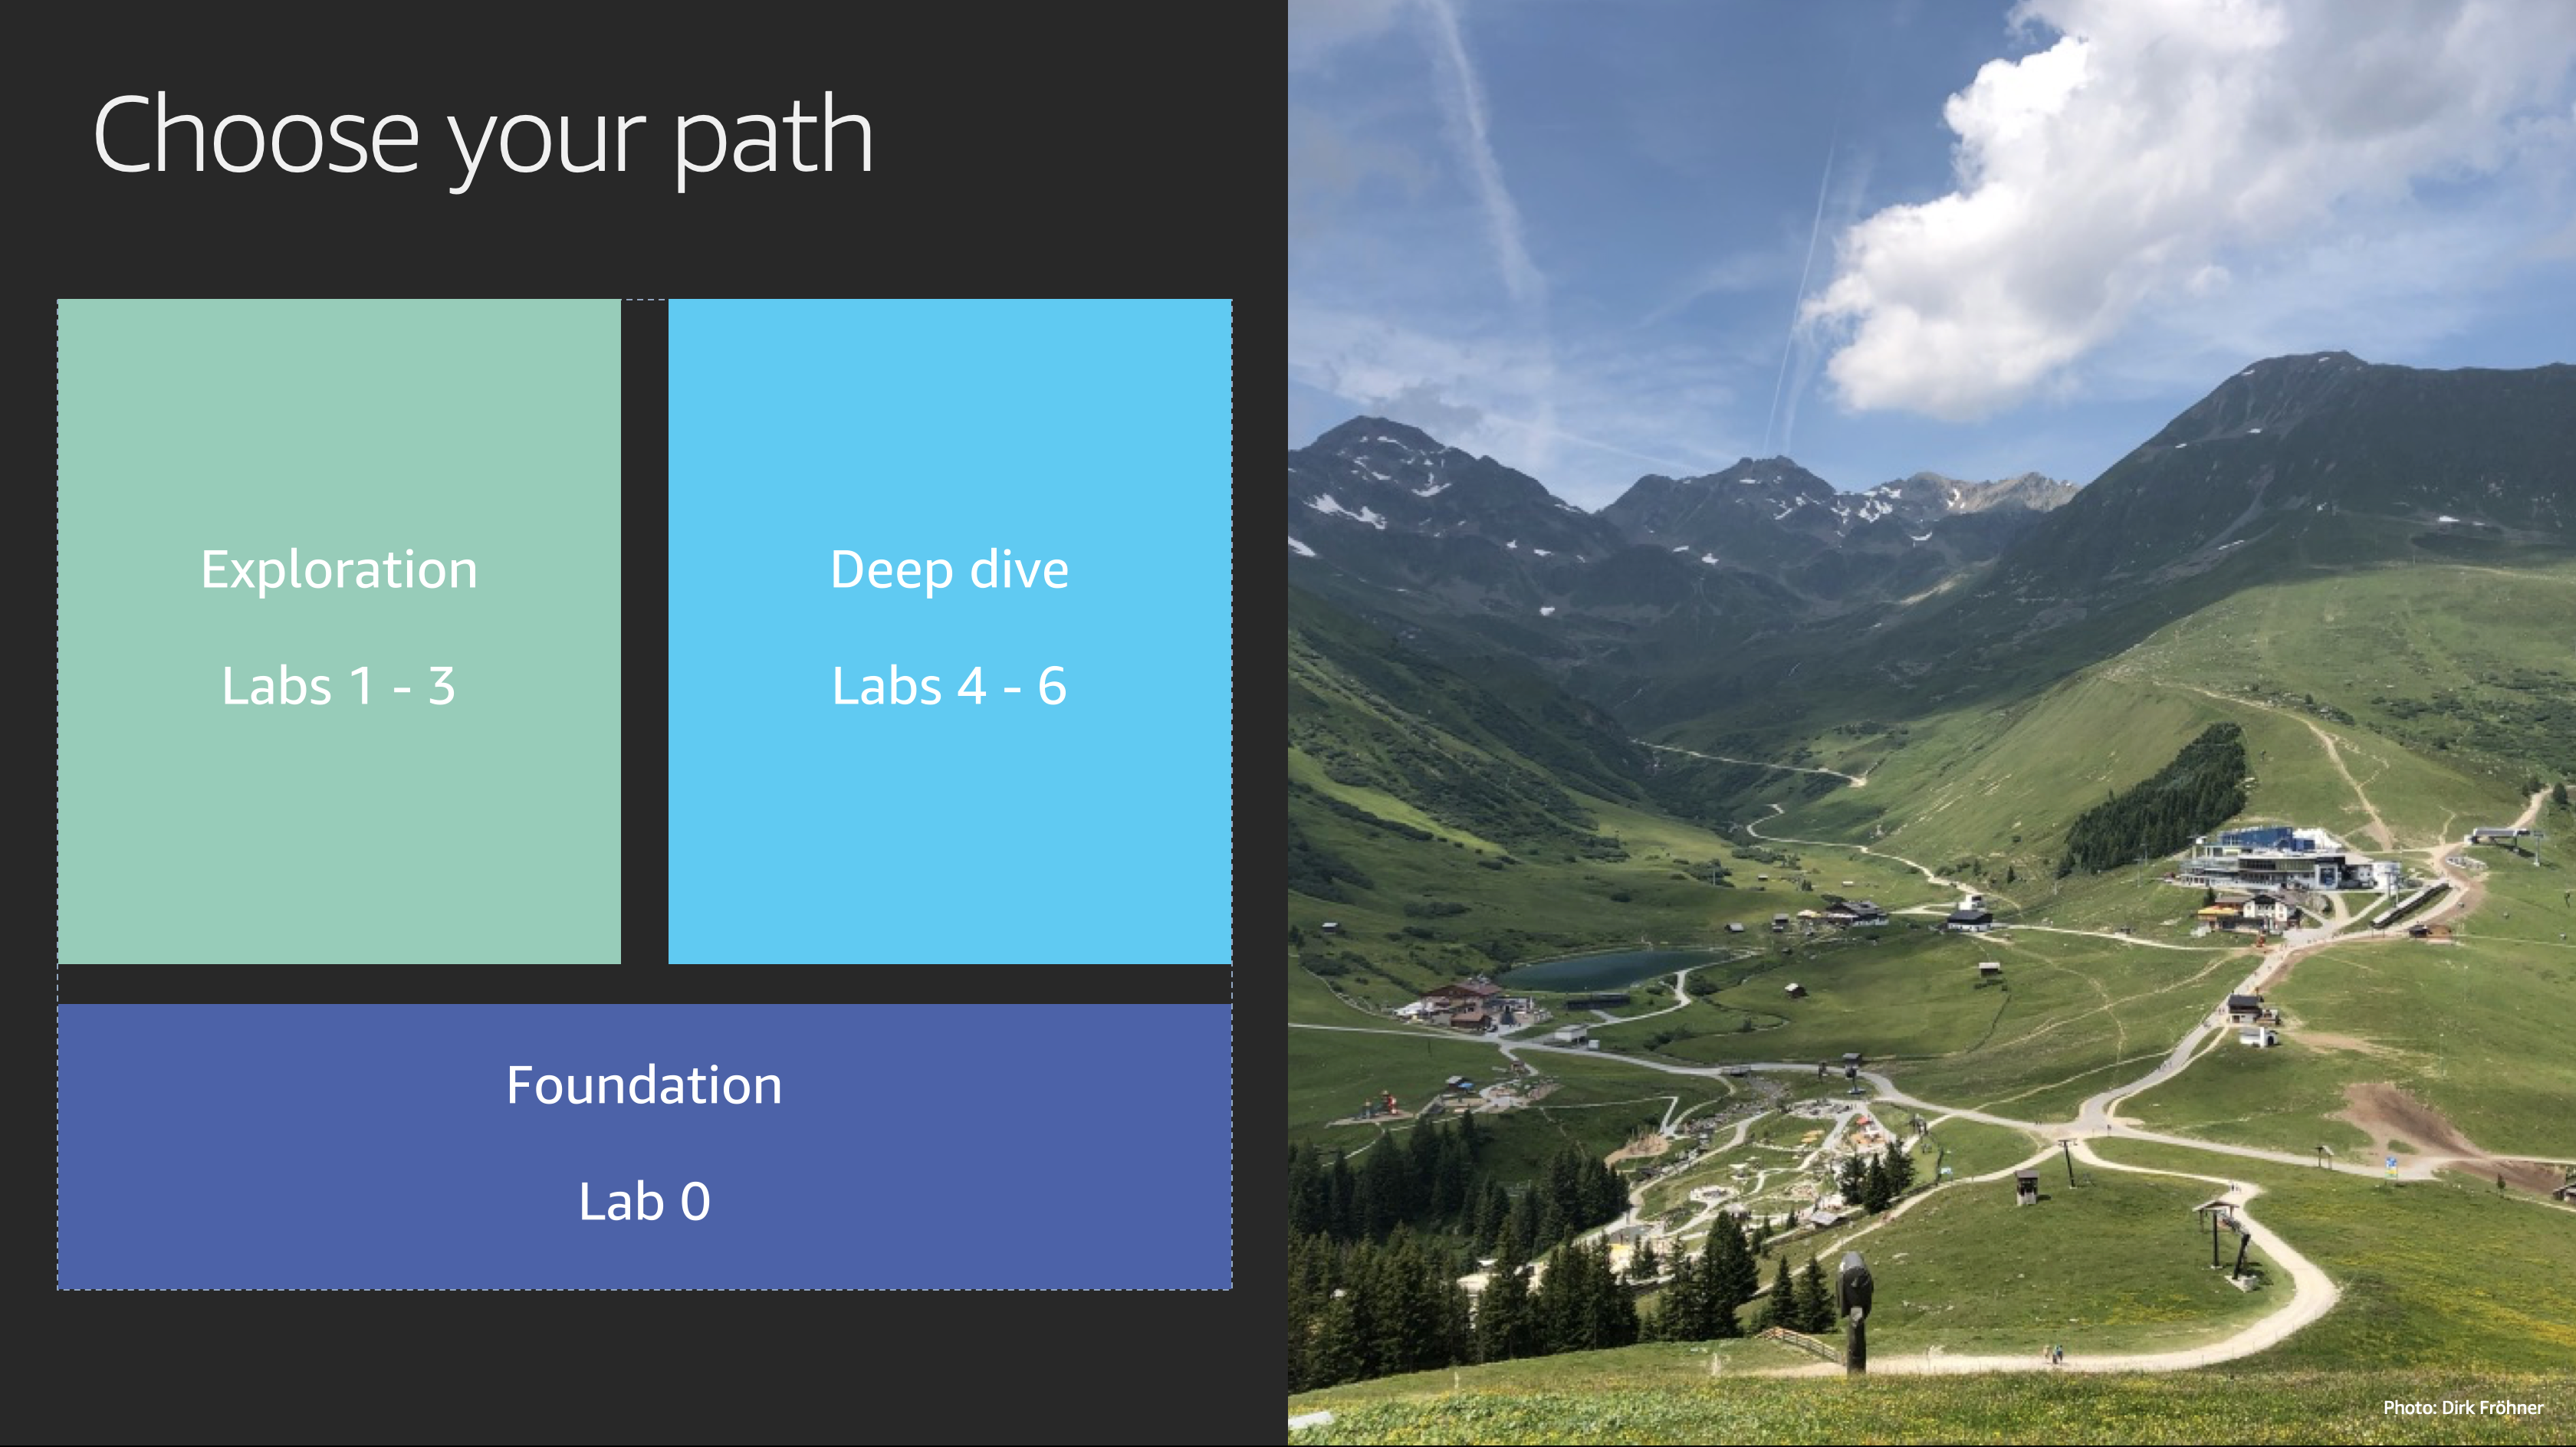
- Lab 0: Create or obtain fictional call recordings, use Amazon Connect or Amazon Polly if you want to create them yourself.
- Lab 1: Explore Amazon Transcribe for Automatic Speech Recognition.
- Lab 2: Explore Amazon Translate for Neural Text Translation.
- Lab 3: Explore Amazon Comprehend for Natural Language Processing.
- Lab 4: Create a processing pipeline to automatically analyze call recordings.
- Lab 5: Use Amazon Athena to run SQL queries on your processing results.
- Lab 6: Use Amazon Quicksight to visualize your processing results.
Credits: Labs 4 - 6 are heavily based on the following two AWS blog posts and the respective code:
Workshop prerequisites
AWS account
At re:Invent, we will provide AWS accounts for the participants, so you don’t have to bring one. We will go into the details of how to access the AWS accounts we provide you with today on the next page.
Laptop and browser
For the hands-on part of this workshop you obviously need your laptop and an internet browser. You should have an up-to-date version of a major internet browser on your laptop. For best results, we recommend one of the following:
- Google Chrome
- Mozilla Firefox
AWS CLI
For the deep dive path you may want to make use of the AWS CLI on your local machine. However, you will not really need it so you might want to consider to not consume time for it.
Additionally, it will be easier to launch a Cloud9 instance in the provided AWS account to make that your local machine for this workshop. If you don’t know what AWS Cloud9 is: We will explain what it is and how to create an environment on the next page, after showing how to access your AWS account.
If you still want to install it on your laptop, maybe later, you can do so now according to the instructions here: https://docs.aws.amazon.com/cli/latest/userguide/install-cliv1.html.
Additional tools
It would be beneficial to have an audio player on your laptop that can play standard audio files like wav or mp3. That way, you will be able to download your call recordings and listen to them on your machine.
Furthermore, a head-set helps when you want to use Amazon Connect for creating call recordings.
Accessing your AWS account
At re:Invent, we will provide AWS accounts for the participants, so you don’t have to bring one. We use an internal tool, Event Engine, to create the accounts and make them available to participants.
Event Engine login
Your workshop facilitators will hand out a 12 digit hash to every participant that you can use to log into the workshop event and access your AWS account.
In order to access your AWS account, open a browser an go to https://dashboard.eventengine.run. You will see the following login screen.
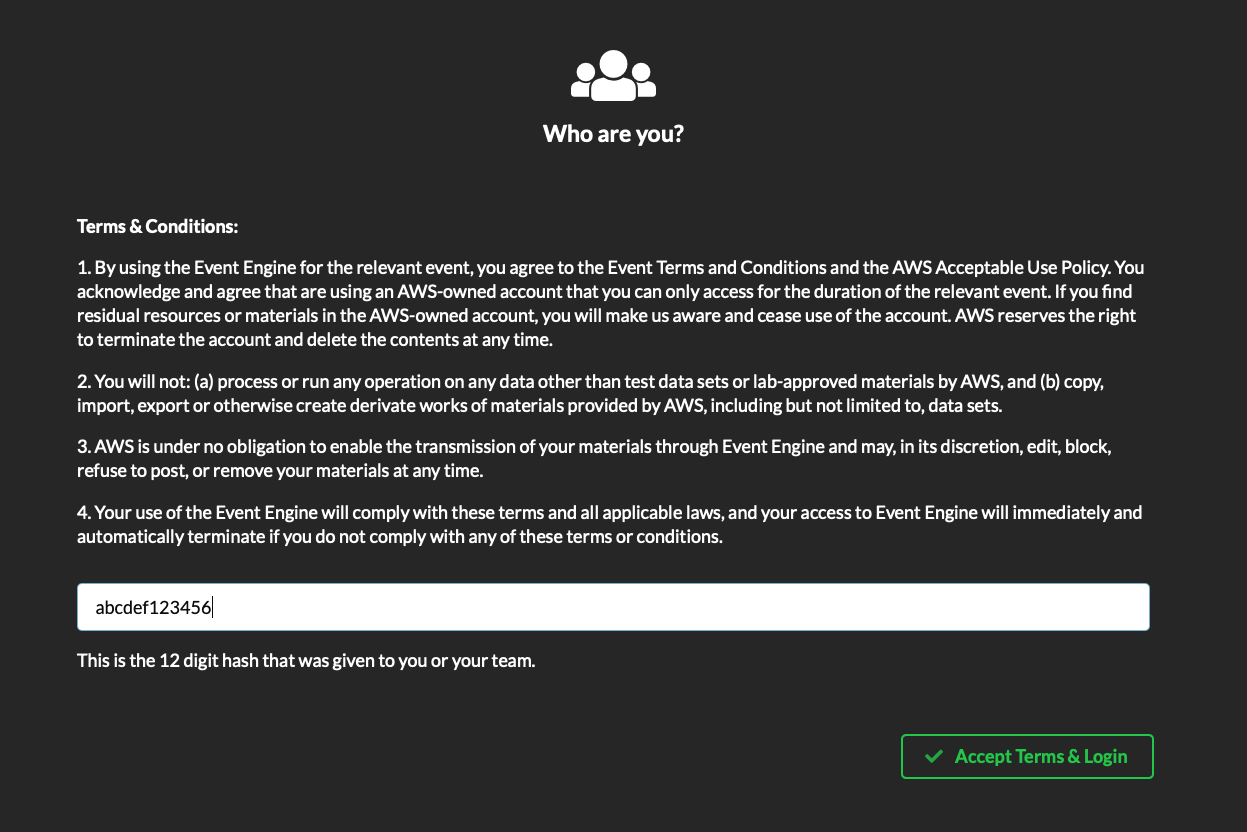
Here you can enter your 12 digit hash and click on Accept Terms & Login.
Team Dashboard
After a successul login, you will land on your Team Dashboard. It’s called like this, because we also use Event Engine for Game Days and other events where multiple participants build up a team and also compete against each other. Today, you can use your AWS account for yourself.
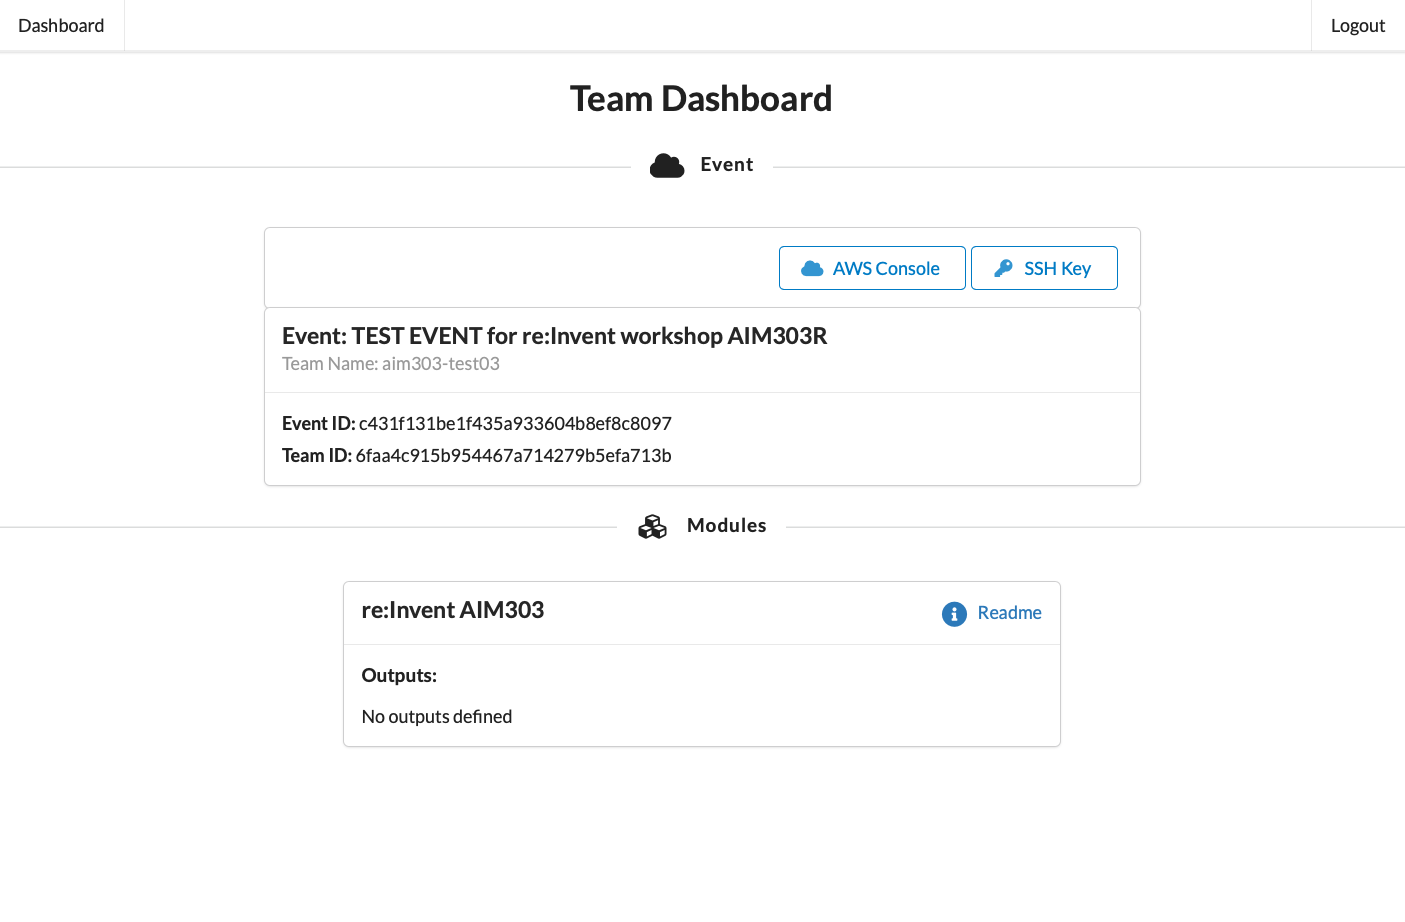
AWS Console Login
In order to access the AWS Management Console for your AWS account, click on the AWS Console button and you will see a pop-up as shown below.
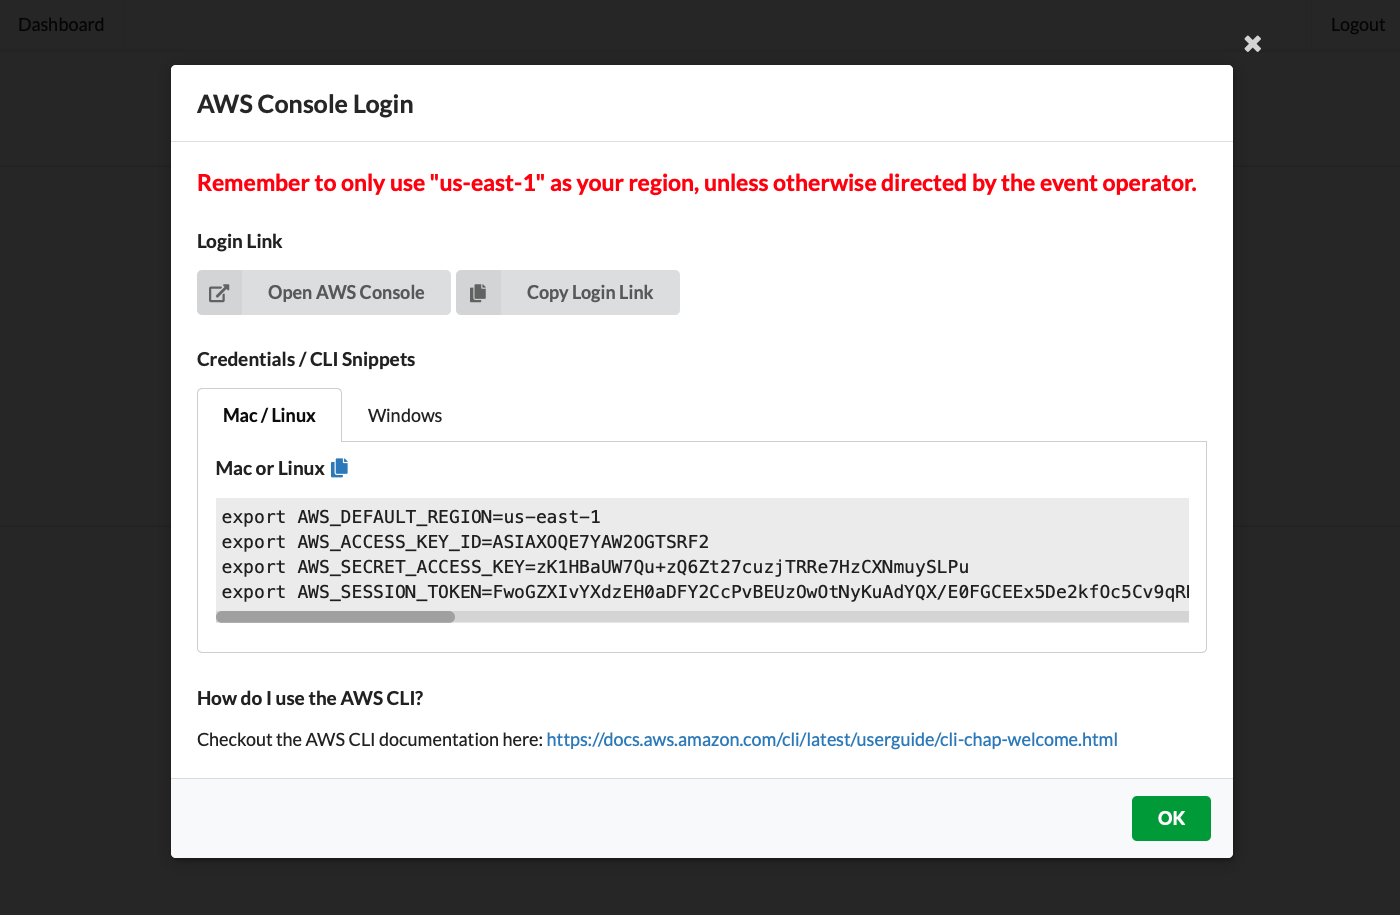
Here you can click on the Open AWS Console button to open the AWS Management Console in a new browser tab.
AWS Management Console
Now you have reached the AWS Management Console for your AWS account, as shown below.
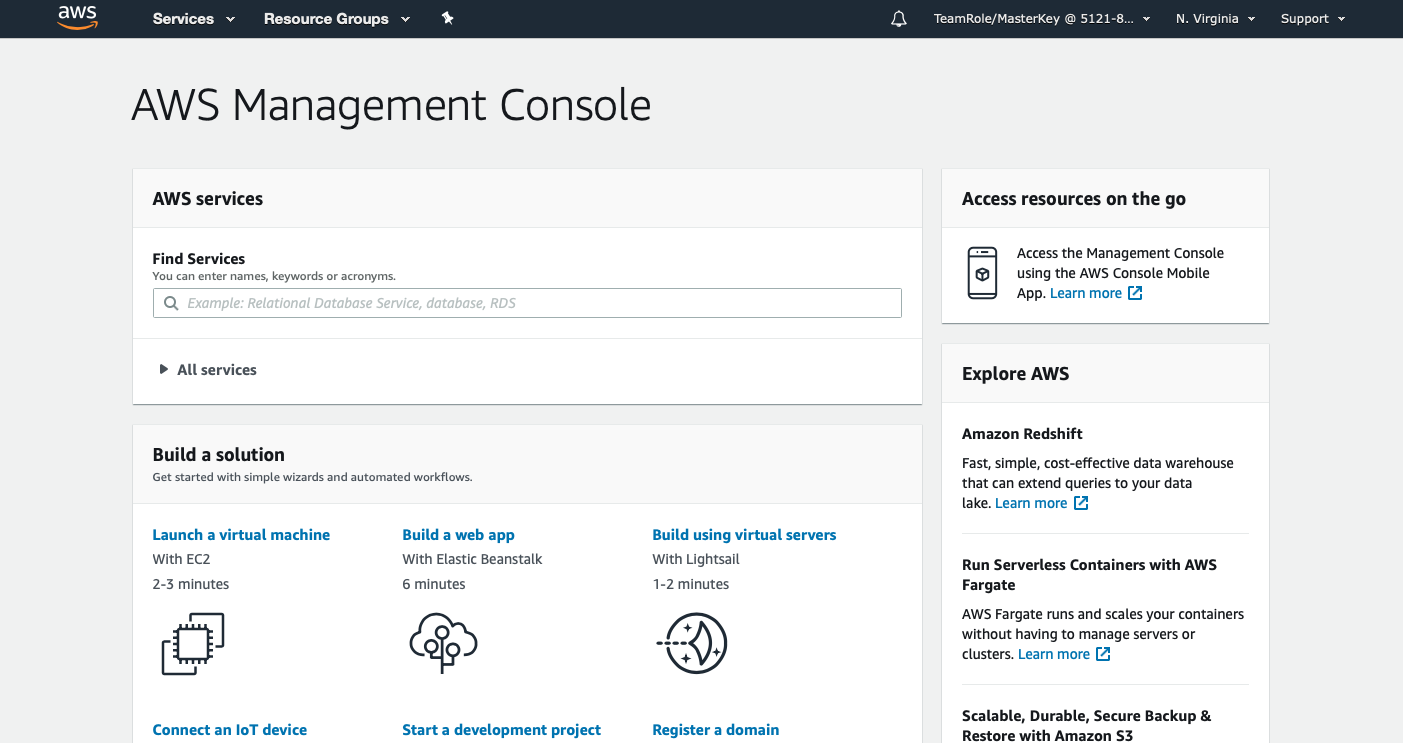
This workshop is designed to run in the us-east-1 region (Northern Virginia). Make sure to create all resources only in that region! You can see the currently selected AWS region in the upper right corner of the screen.
Access the console for a certain AWS service
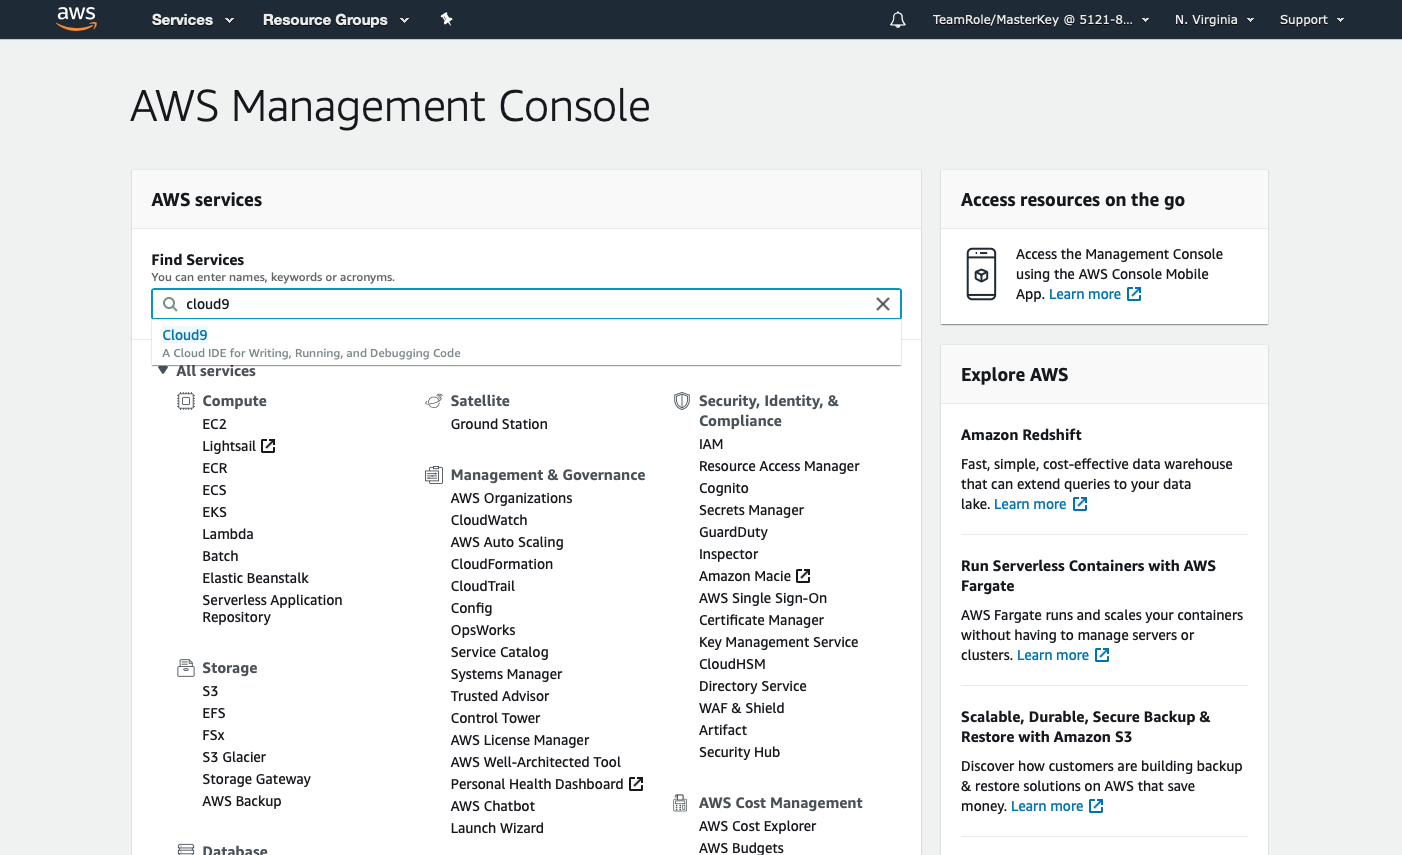
To continue to the console of a specific AWS service, you can start typing in the Find Services field, or you can click on All services to open the complete list of available AWS services and click on the name of the service you want to use.
Optional: Create AWS Cloud9 environment
For the hands-on part of this workshop you obviously need your laptop. For the deep dive path you may want to make use of the AWS CLI on your local machine. You can also launch a Cloud9 instance in the provided AWS account to make that your local machine for this workshop.
AWS Cloud9 is a cloud-based integrated development environment (IDE) that lets you write, run, and debug your code with just a browser. It includes a code editor, debugger, and terminal. Cloud9 comes prepackaged with essential tools for popular programming languages. It also has the AWS CLI installed and you can launch the underlying EC2 instance with an IAM role that allows it to call other AWS services on your behalf. That way, you don’t have to set up the AWS CLI with an AWS access key directly on your laptop, but can use the terminal tabs in Cloud9 instead.
If you want to use a Cloud9 instance for AWS CLI commands, just go to the AWS Cloud9 console, click on the Create environment button, enter a Name, accept all the default settings, and - after a review of the settings - click on the final Create environment button to have your Cloud9 instance created. This will take only very few minutes. Once your environment is ready, it will look similar to the screenshot below.
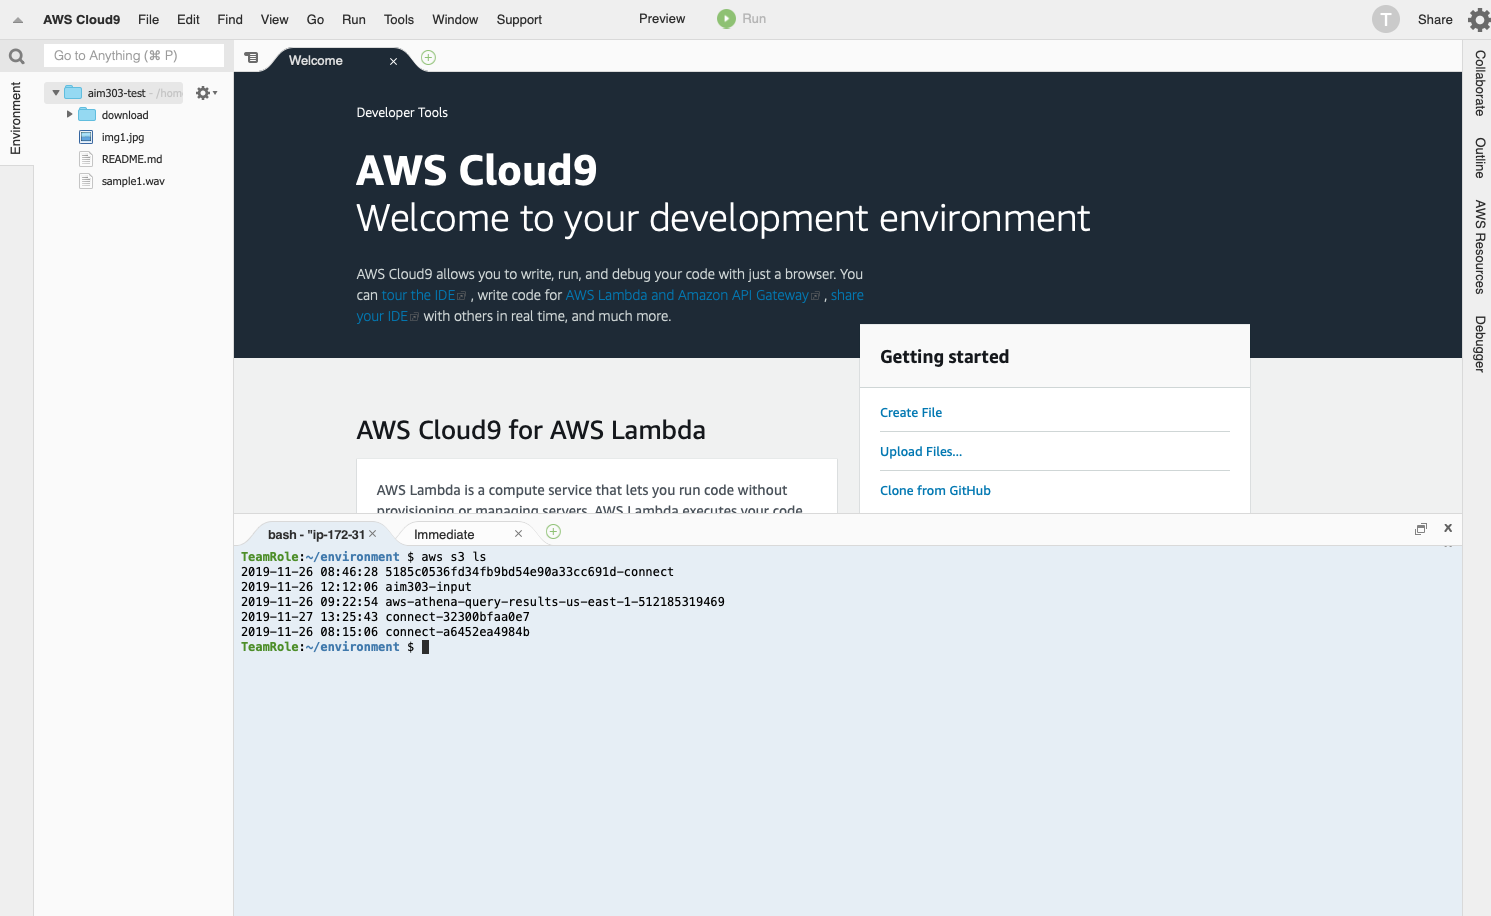
You can now use the terminal tabs for running AWS CLI commands in your AWS account. You can resize all tabs as you like.
Region selection
Just to stress this again:
This workshop is designed to run in the us-east-1 region (Northern Virginia). Make sure to create all resources only in that region! When you log into the AWS management console, you can see the currently selected AWS region in the upper right corner of the screen.