Architecture Creation
Create the AWS CloudFormation stack
Let’s launch the AWS CloudFormation template and create our stack now. We do this first and then have a look into some of the details.
AWS CloudFormation provides a common language for you to describe and provision infrastructure resources in your cloud environment. CloudFormation allows you to use a simple text file to model and provision, in an automated and secure manner, all the resources needed for your applications across all regions and accounts. This file serves as the single source of truth for your cloud environment.
It’s just code: Codifying your infrastructure allows you to treat your infrastru3cture as just code. You can author it with any code editor, check it into a version control system, and review the files with team members before deploying into production.
Log into your AWS account
Before you launch the AWS CloudFormation template, please make sure that your are logged into your AWS account. If you’re unsure about how to do this, please review Accessing your AWS account in the Introduction chapter once more.
Open the AWS CloudFormation console
Almost directly below this sentence, you will find a blue Note box that contains a button labeled Launch stack that links to the AWS CloudFormation template that will create the architecture for the processing pipeline.
If the default browser on your laptop is the same browser that you use to log into your AWS account for this workshop, you can simply click on that button.
If you use a different browser to log into your AWS account for this workshop, you can copy the link location behind the button into your clipboard and paste it into a tab of that browser.

Prepare stack creation
After following the link behind the above
Launch stackbutton, you will land on the AWS CloudFormation management console. In this first screen, you can leave all values as they are. We specify the location of the AWS CloudFormation template that we use as source for our stack creation here. Click on theNextbutton to continue.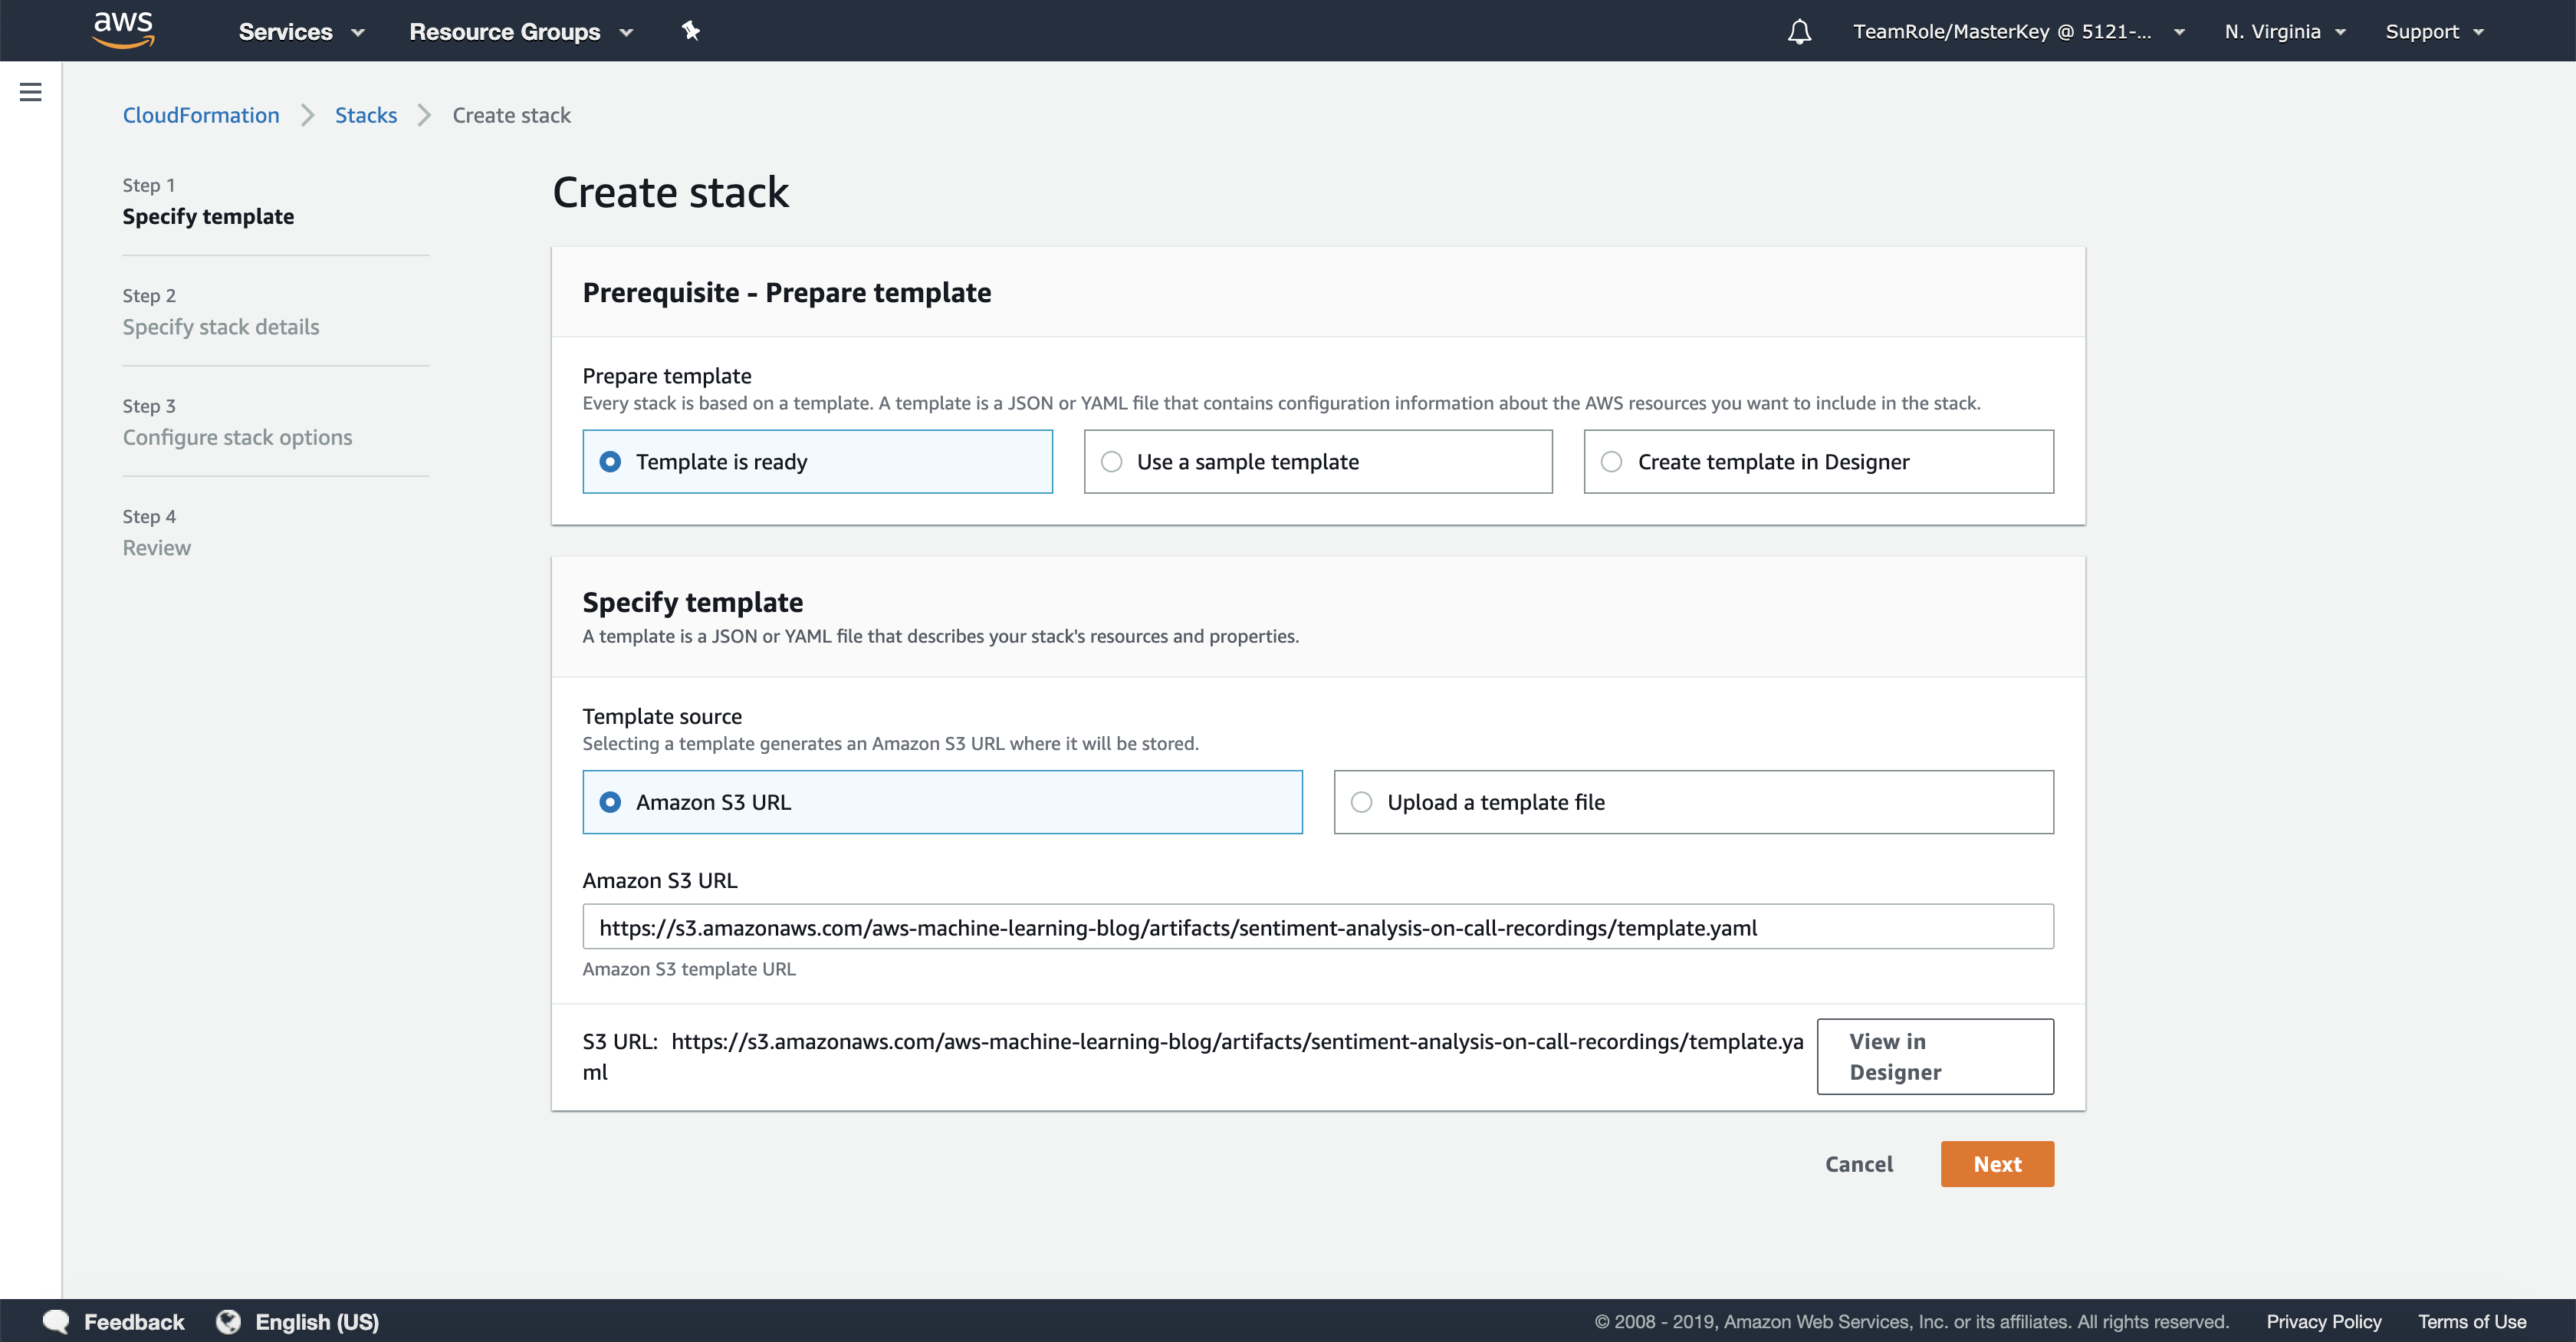
On the next screen,
Specify stack details, you can enter a name for your stack in theStack namefield, but just leave the default name that is already provided. You can furthermore specify path prefixes for S3 objects for intermediate processing results in the pipeline. Please also leave the default values untouched here. Click on theNextbutton to continue.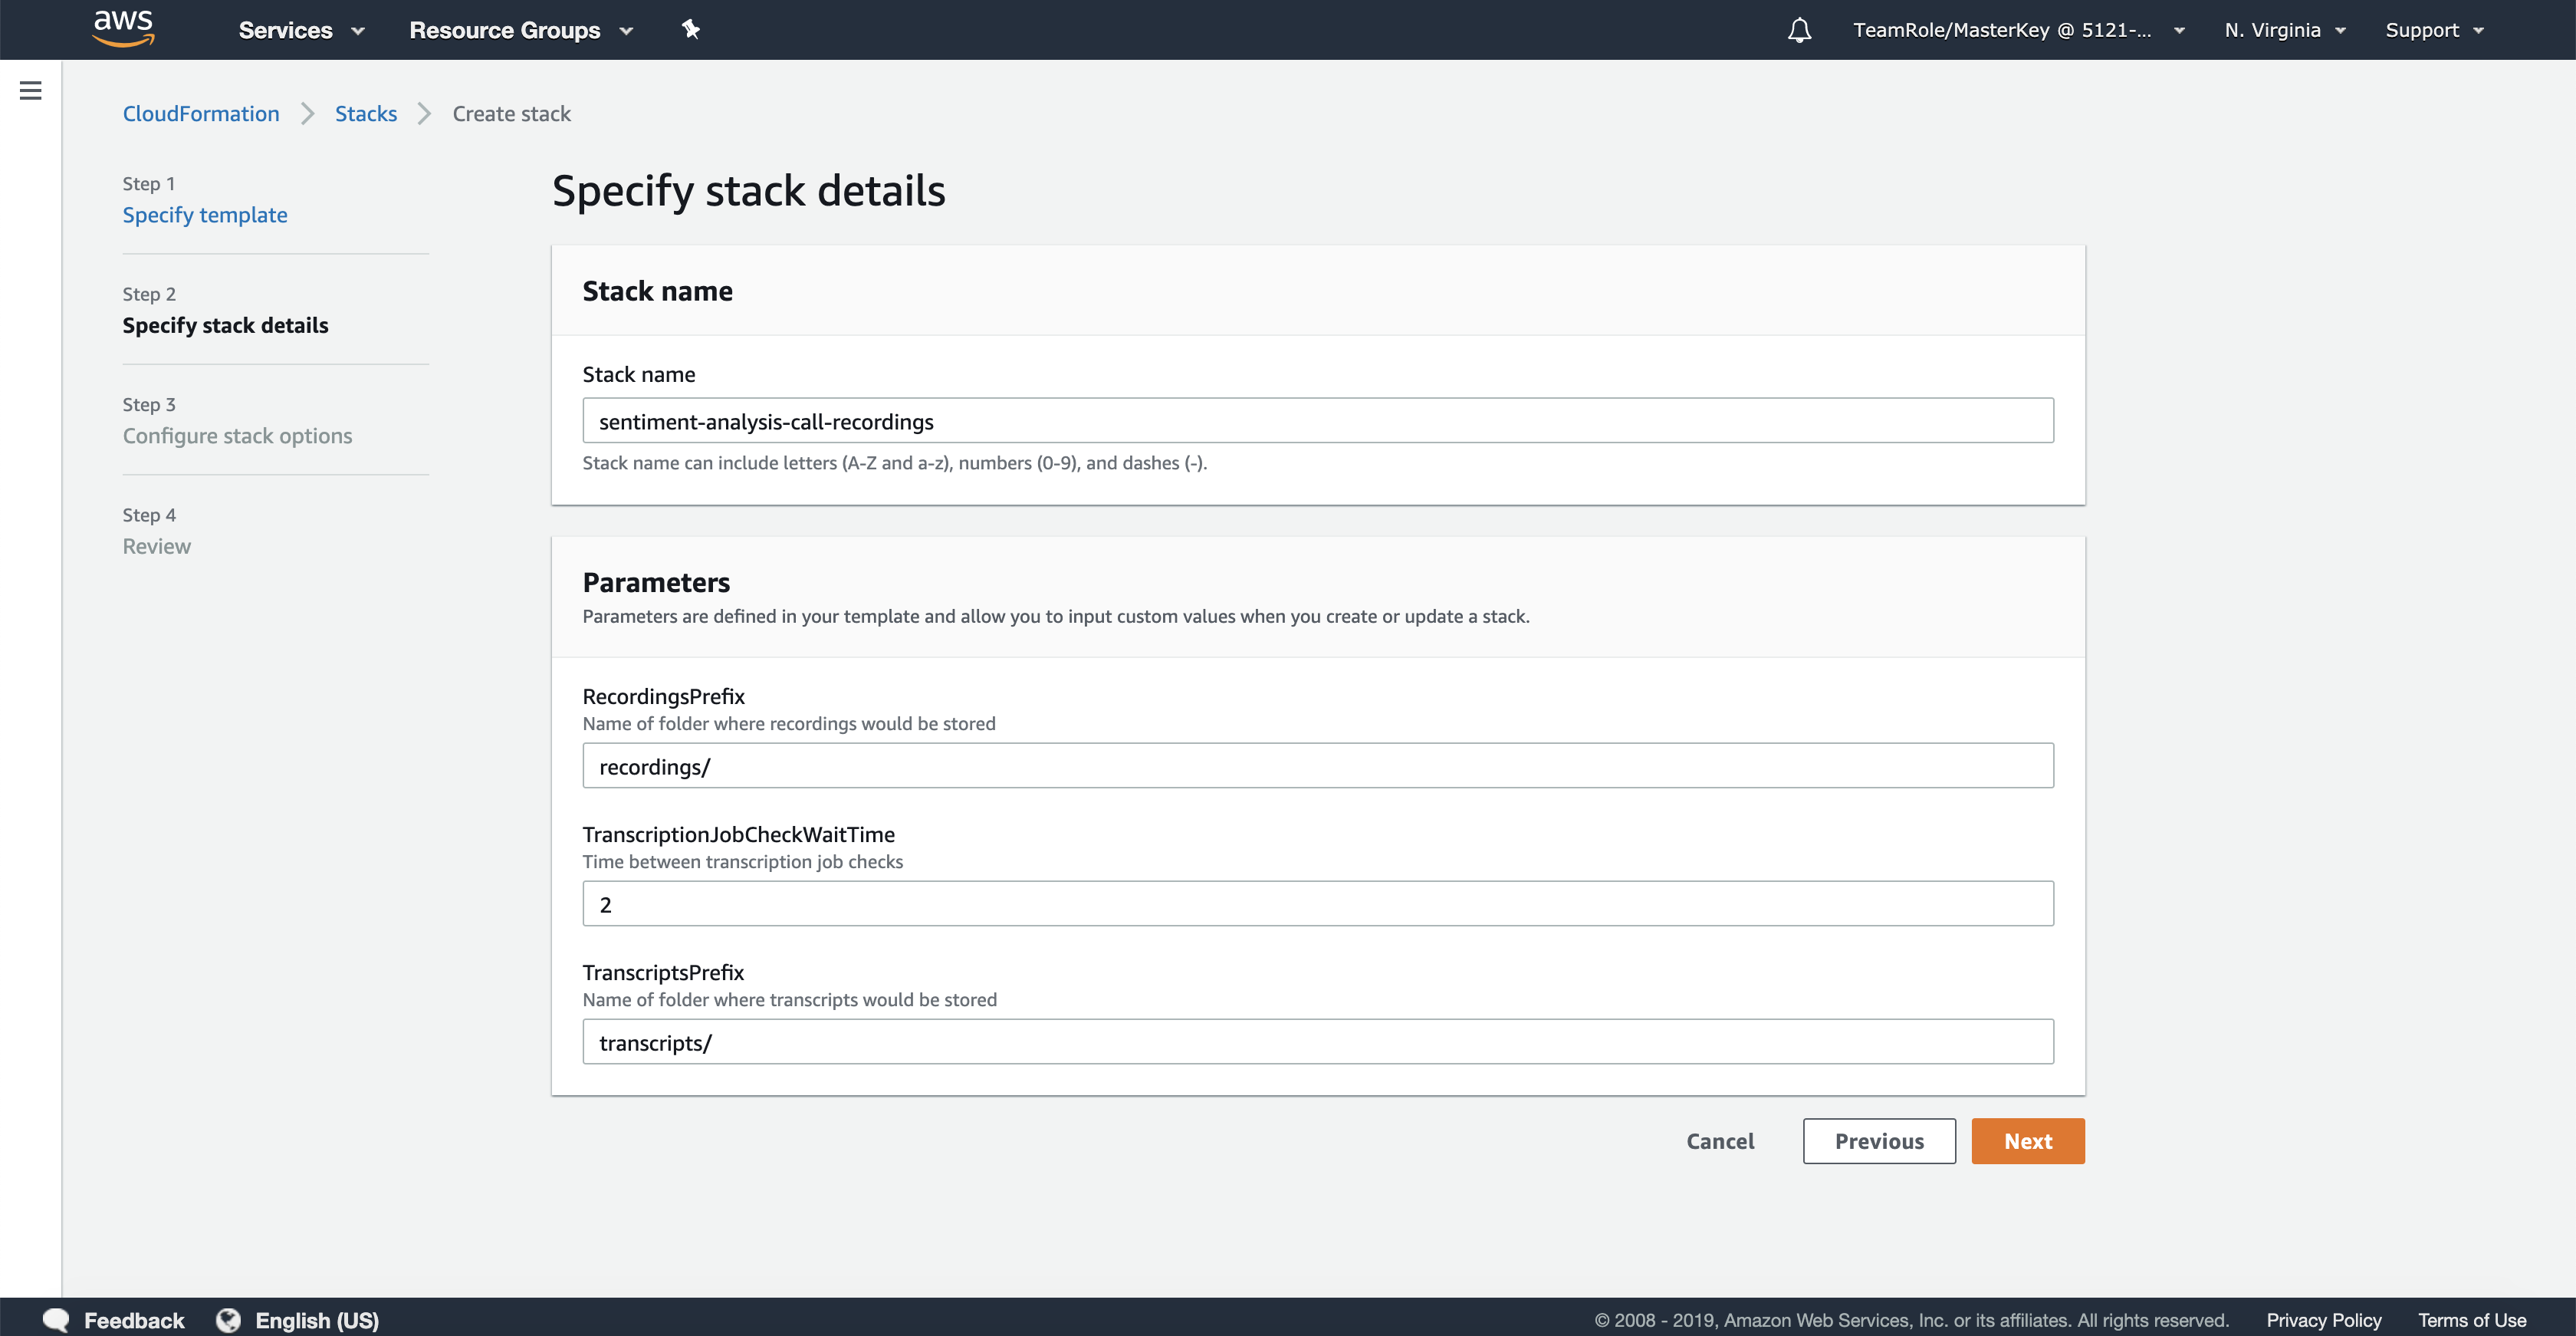
On the next screen,
Configure stack options, you can - among other things - tag your stack and effectively the resources that will be created. Tagging AWS resources is a very powerful means under various aspects that include cost allocation, automation, or access control. We’d encourage you to have a look into the AWS Tagging Strategies article for an overview. For our stack, you’re free to enter a tag, e.g. with keyprojectand valueai-services-workshop, but you can also skip it. Again, just leave all the default values and click theNextbutton.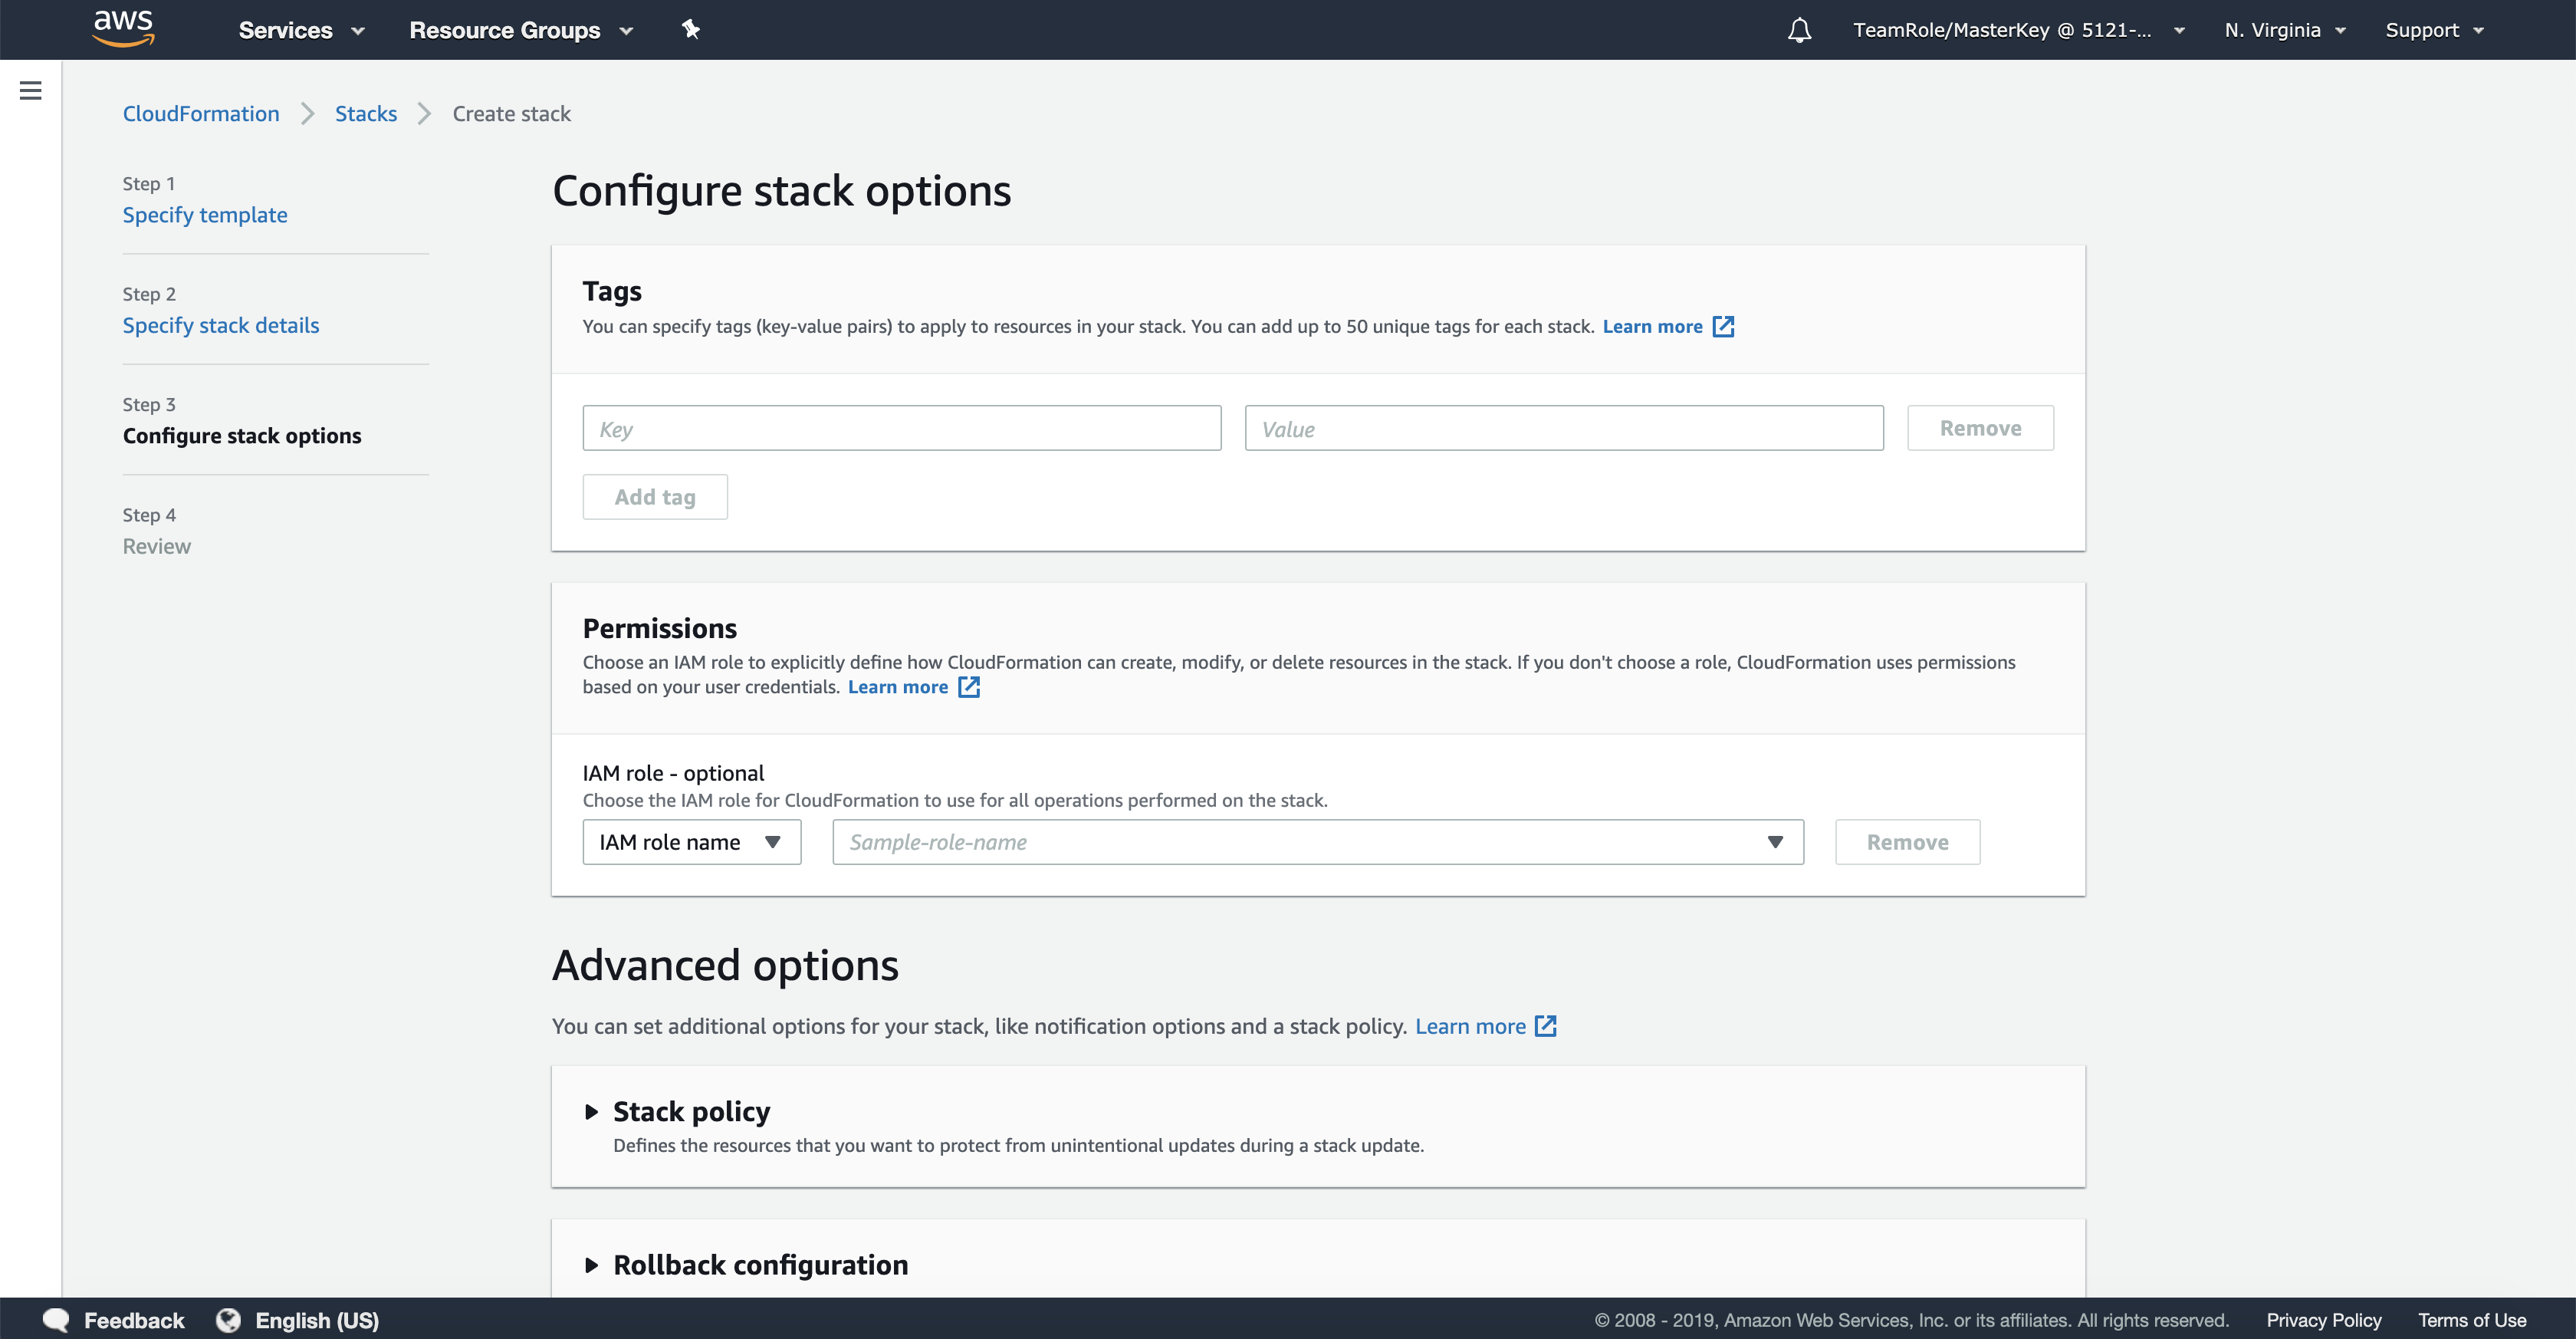
On the next screen,
Review <stack name>, you get a summary of what you have confirmed on the previous screens.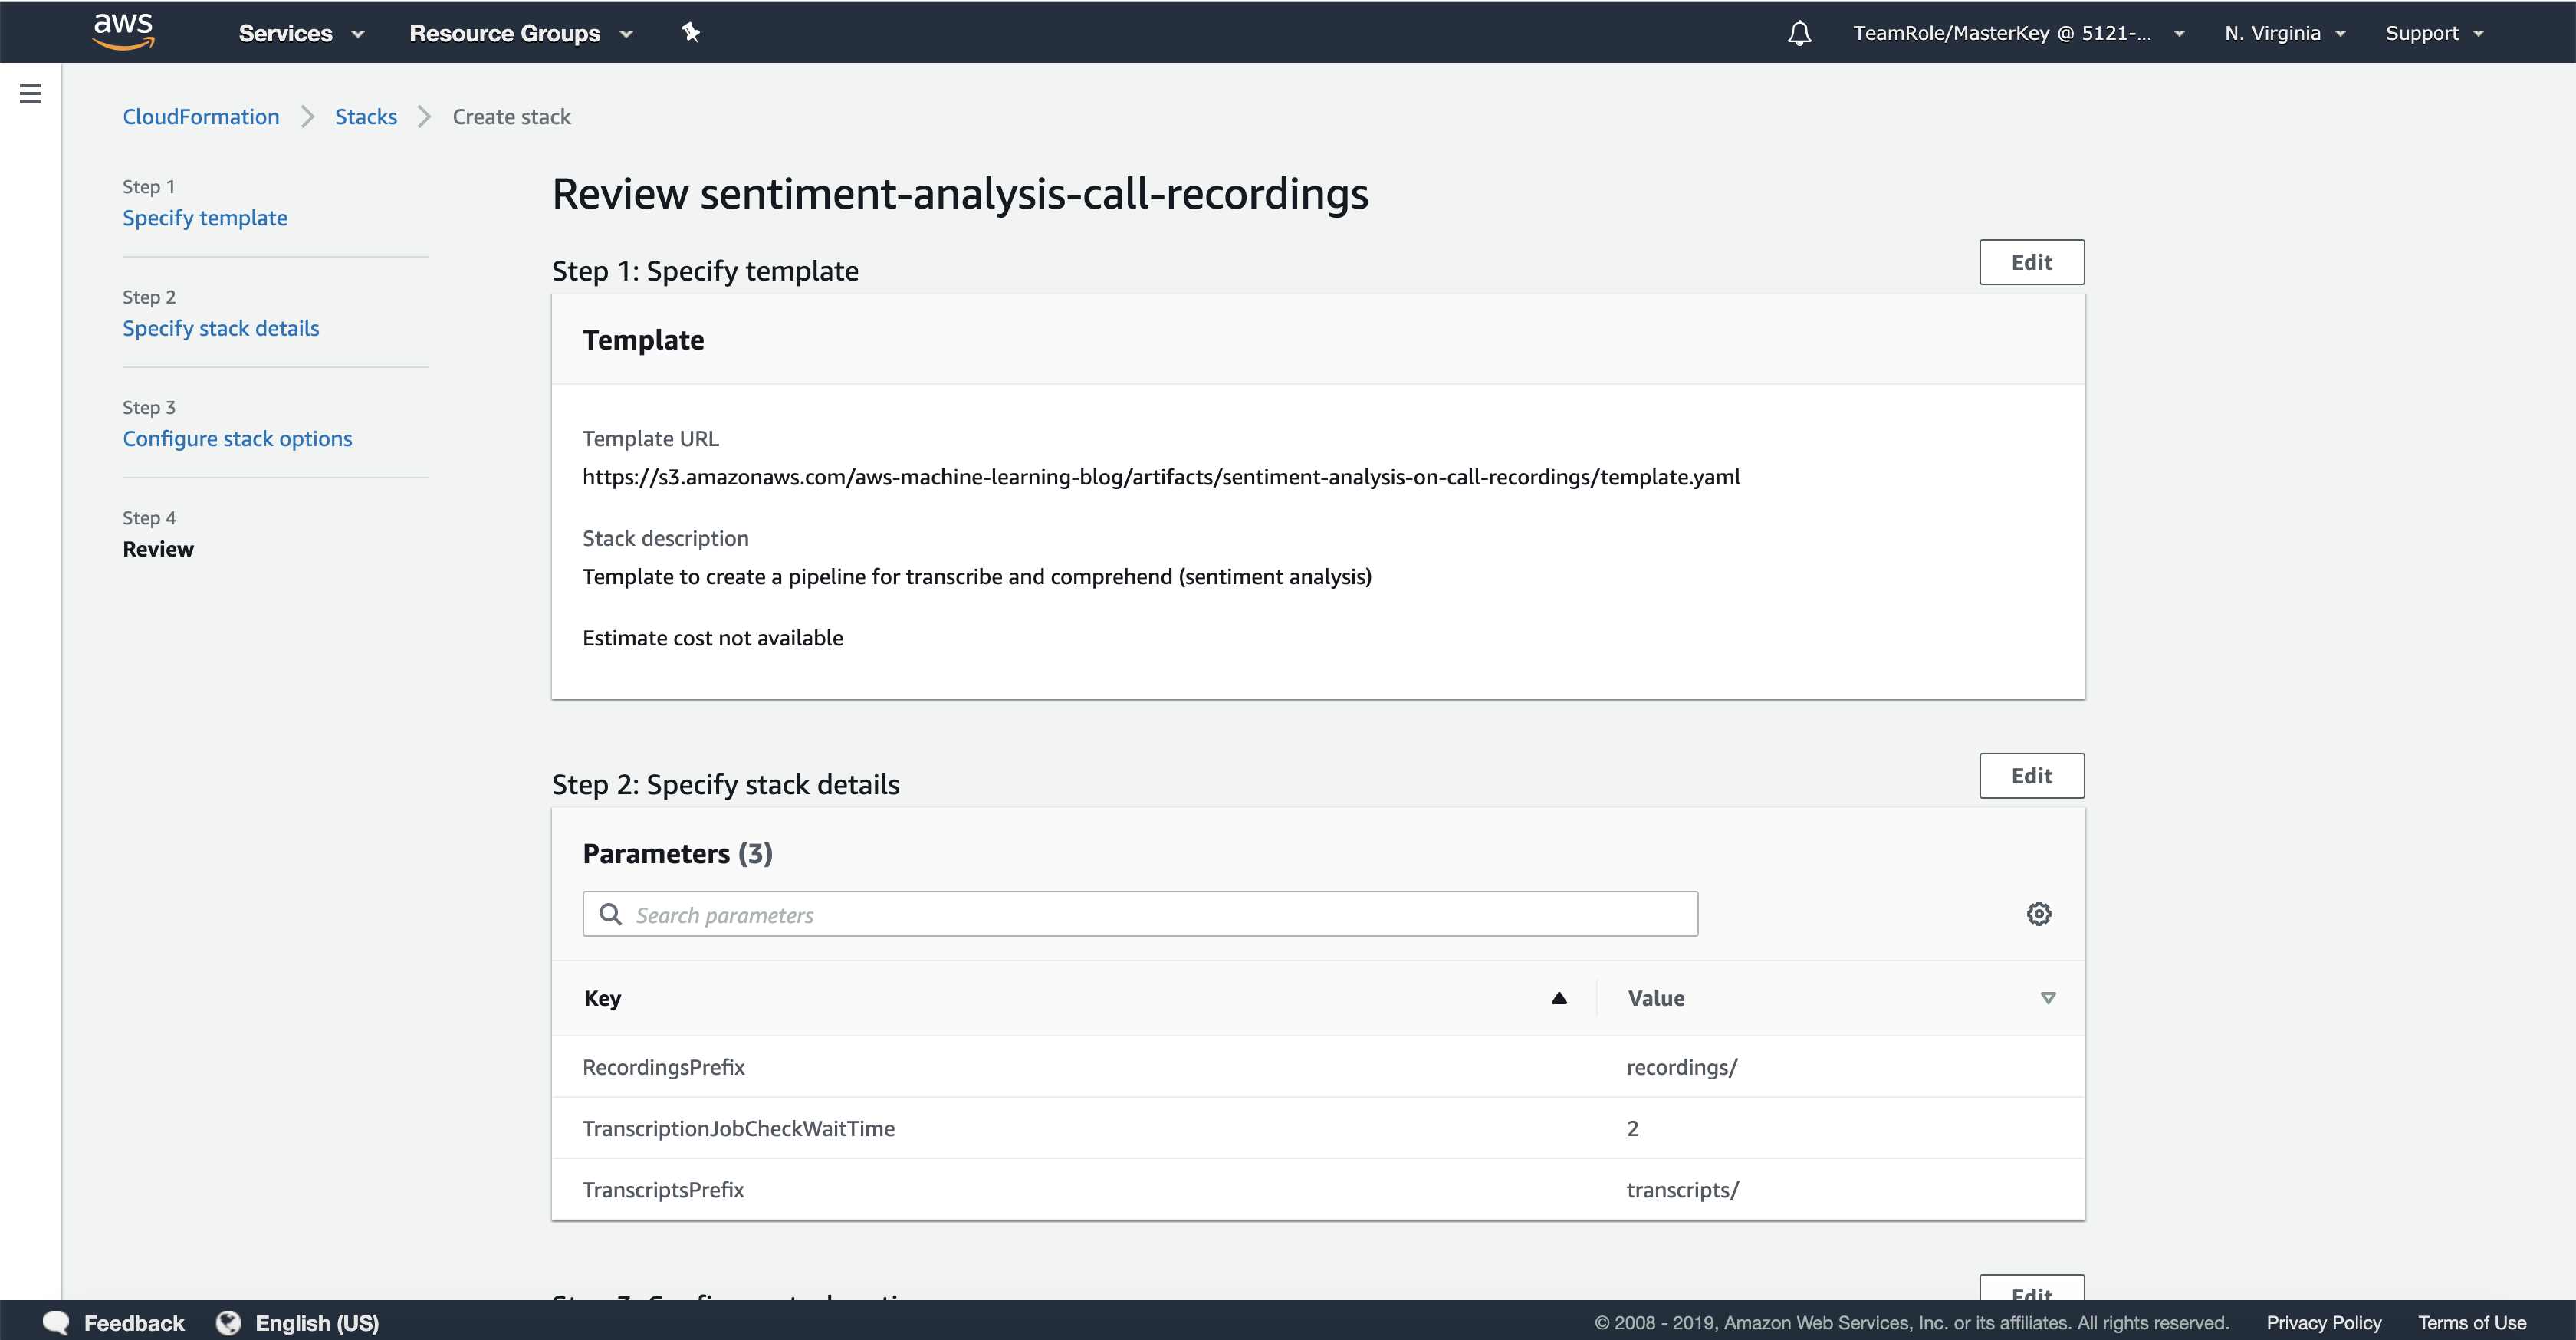
Scroll down to the bottom and check all three check boxes in order to allow AWS CloudFormation to perform the actions you’re asking it to do on your behalf. Then click on the
Create stackbutton.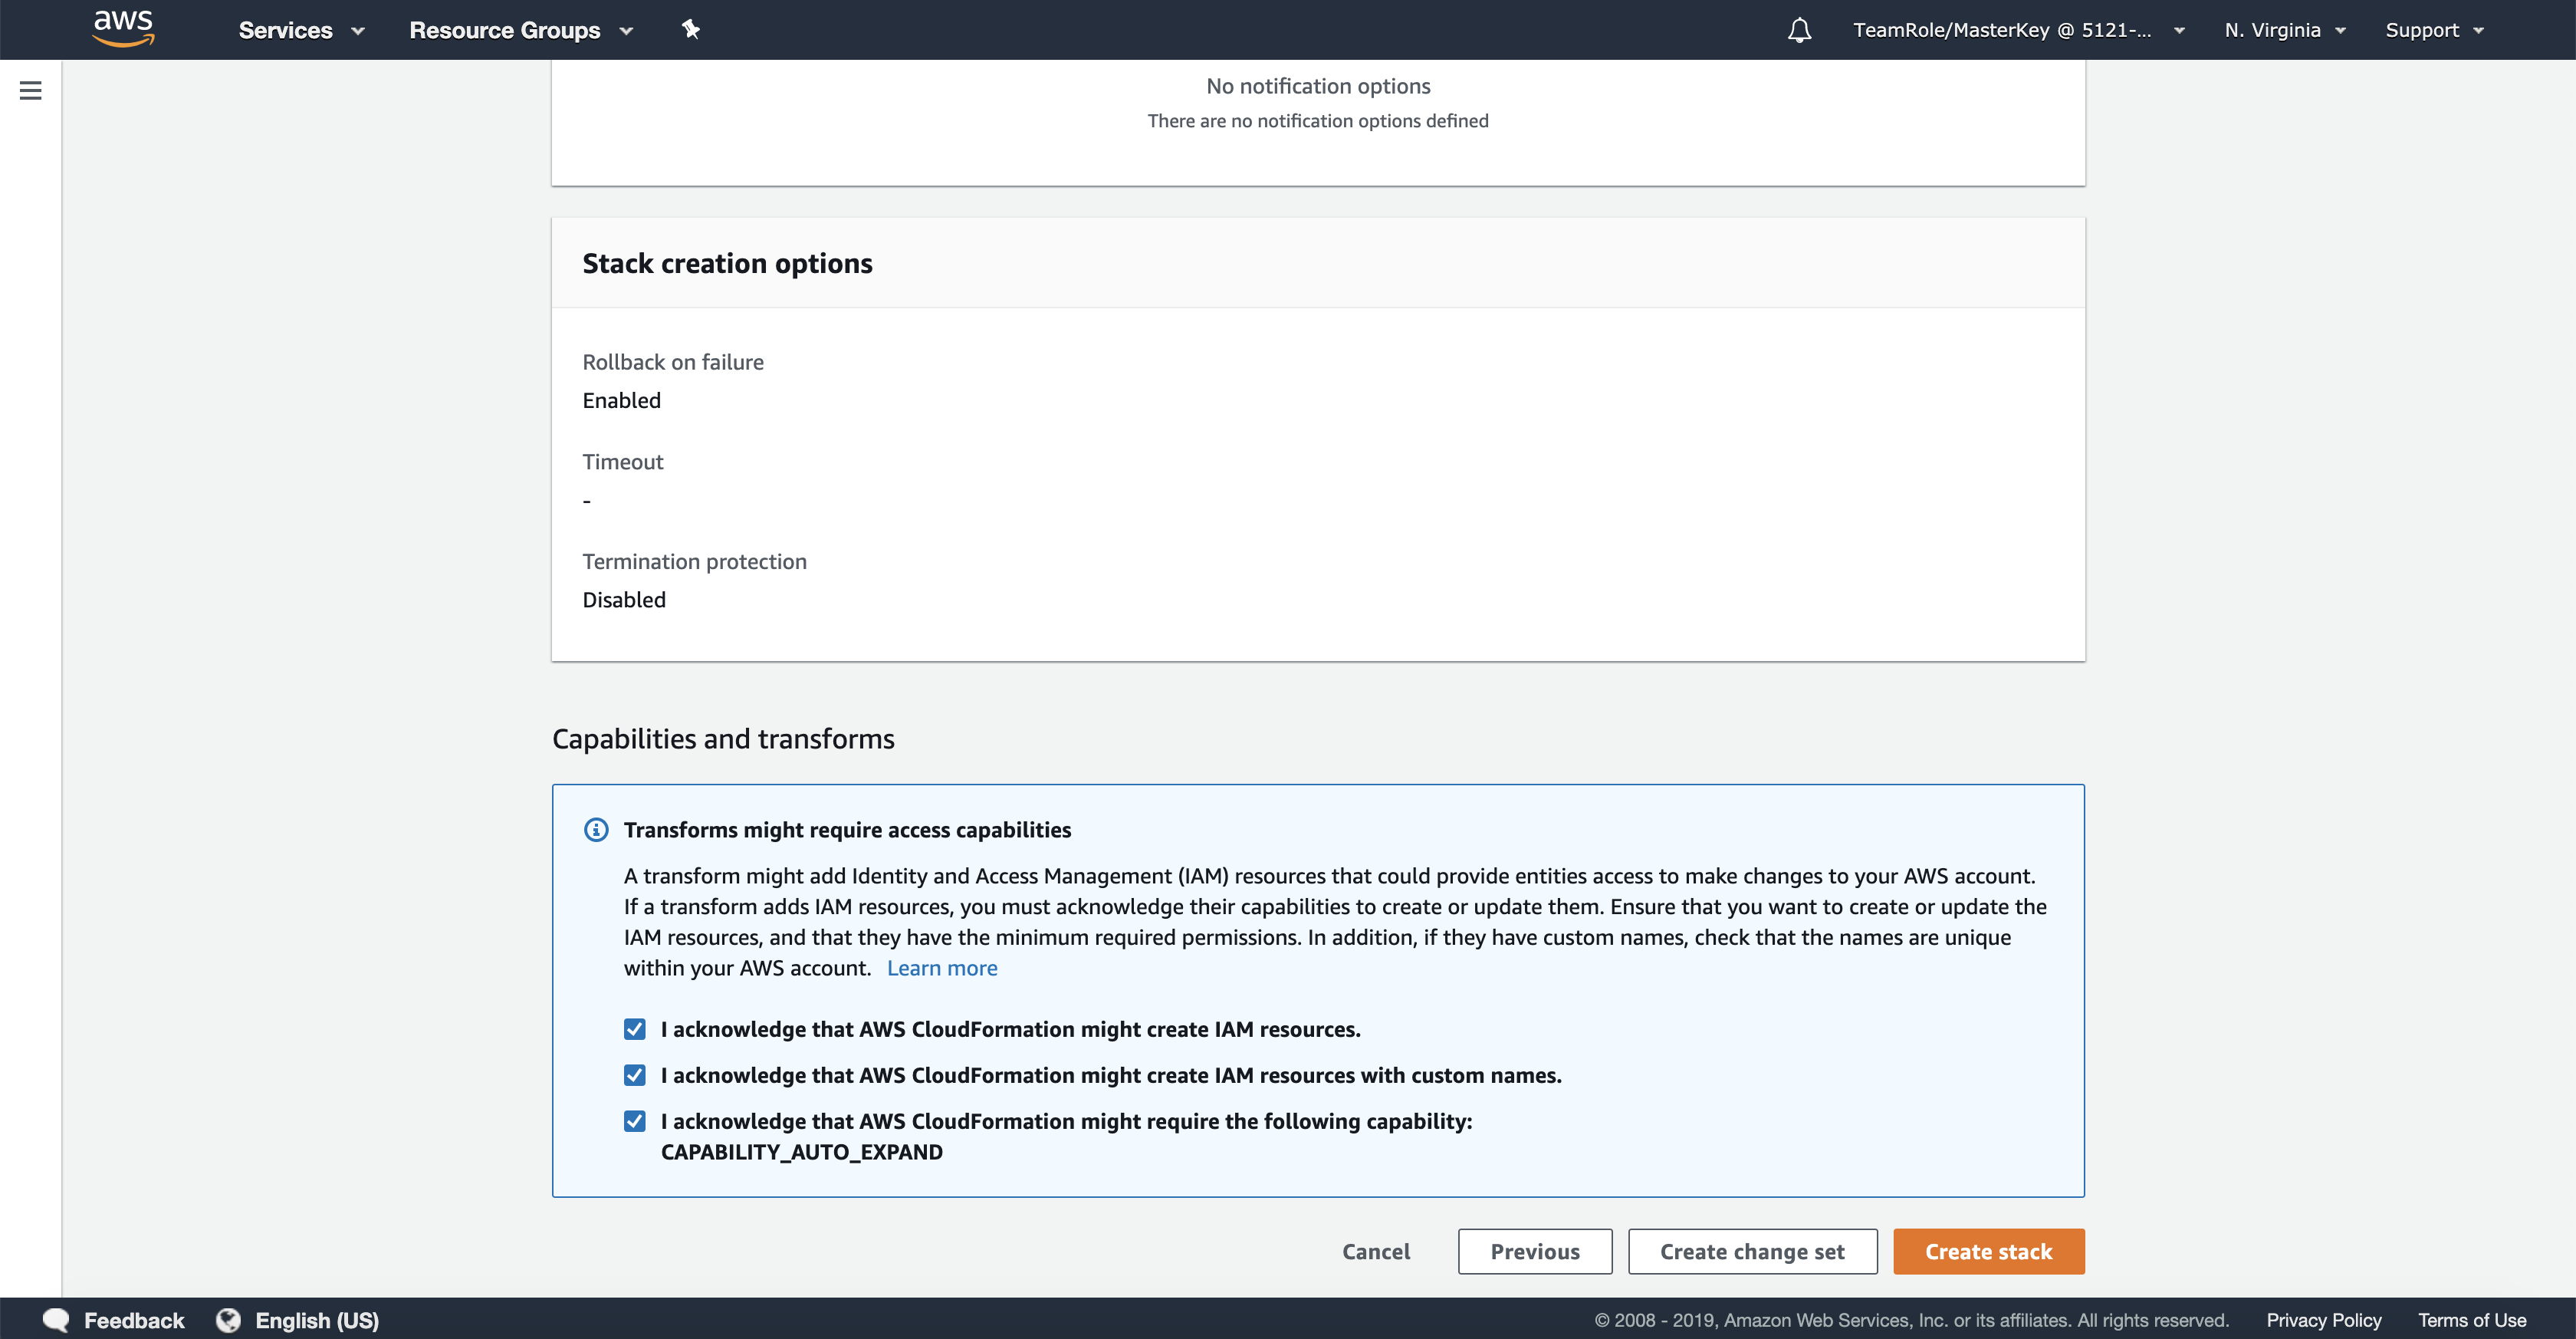
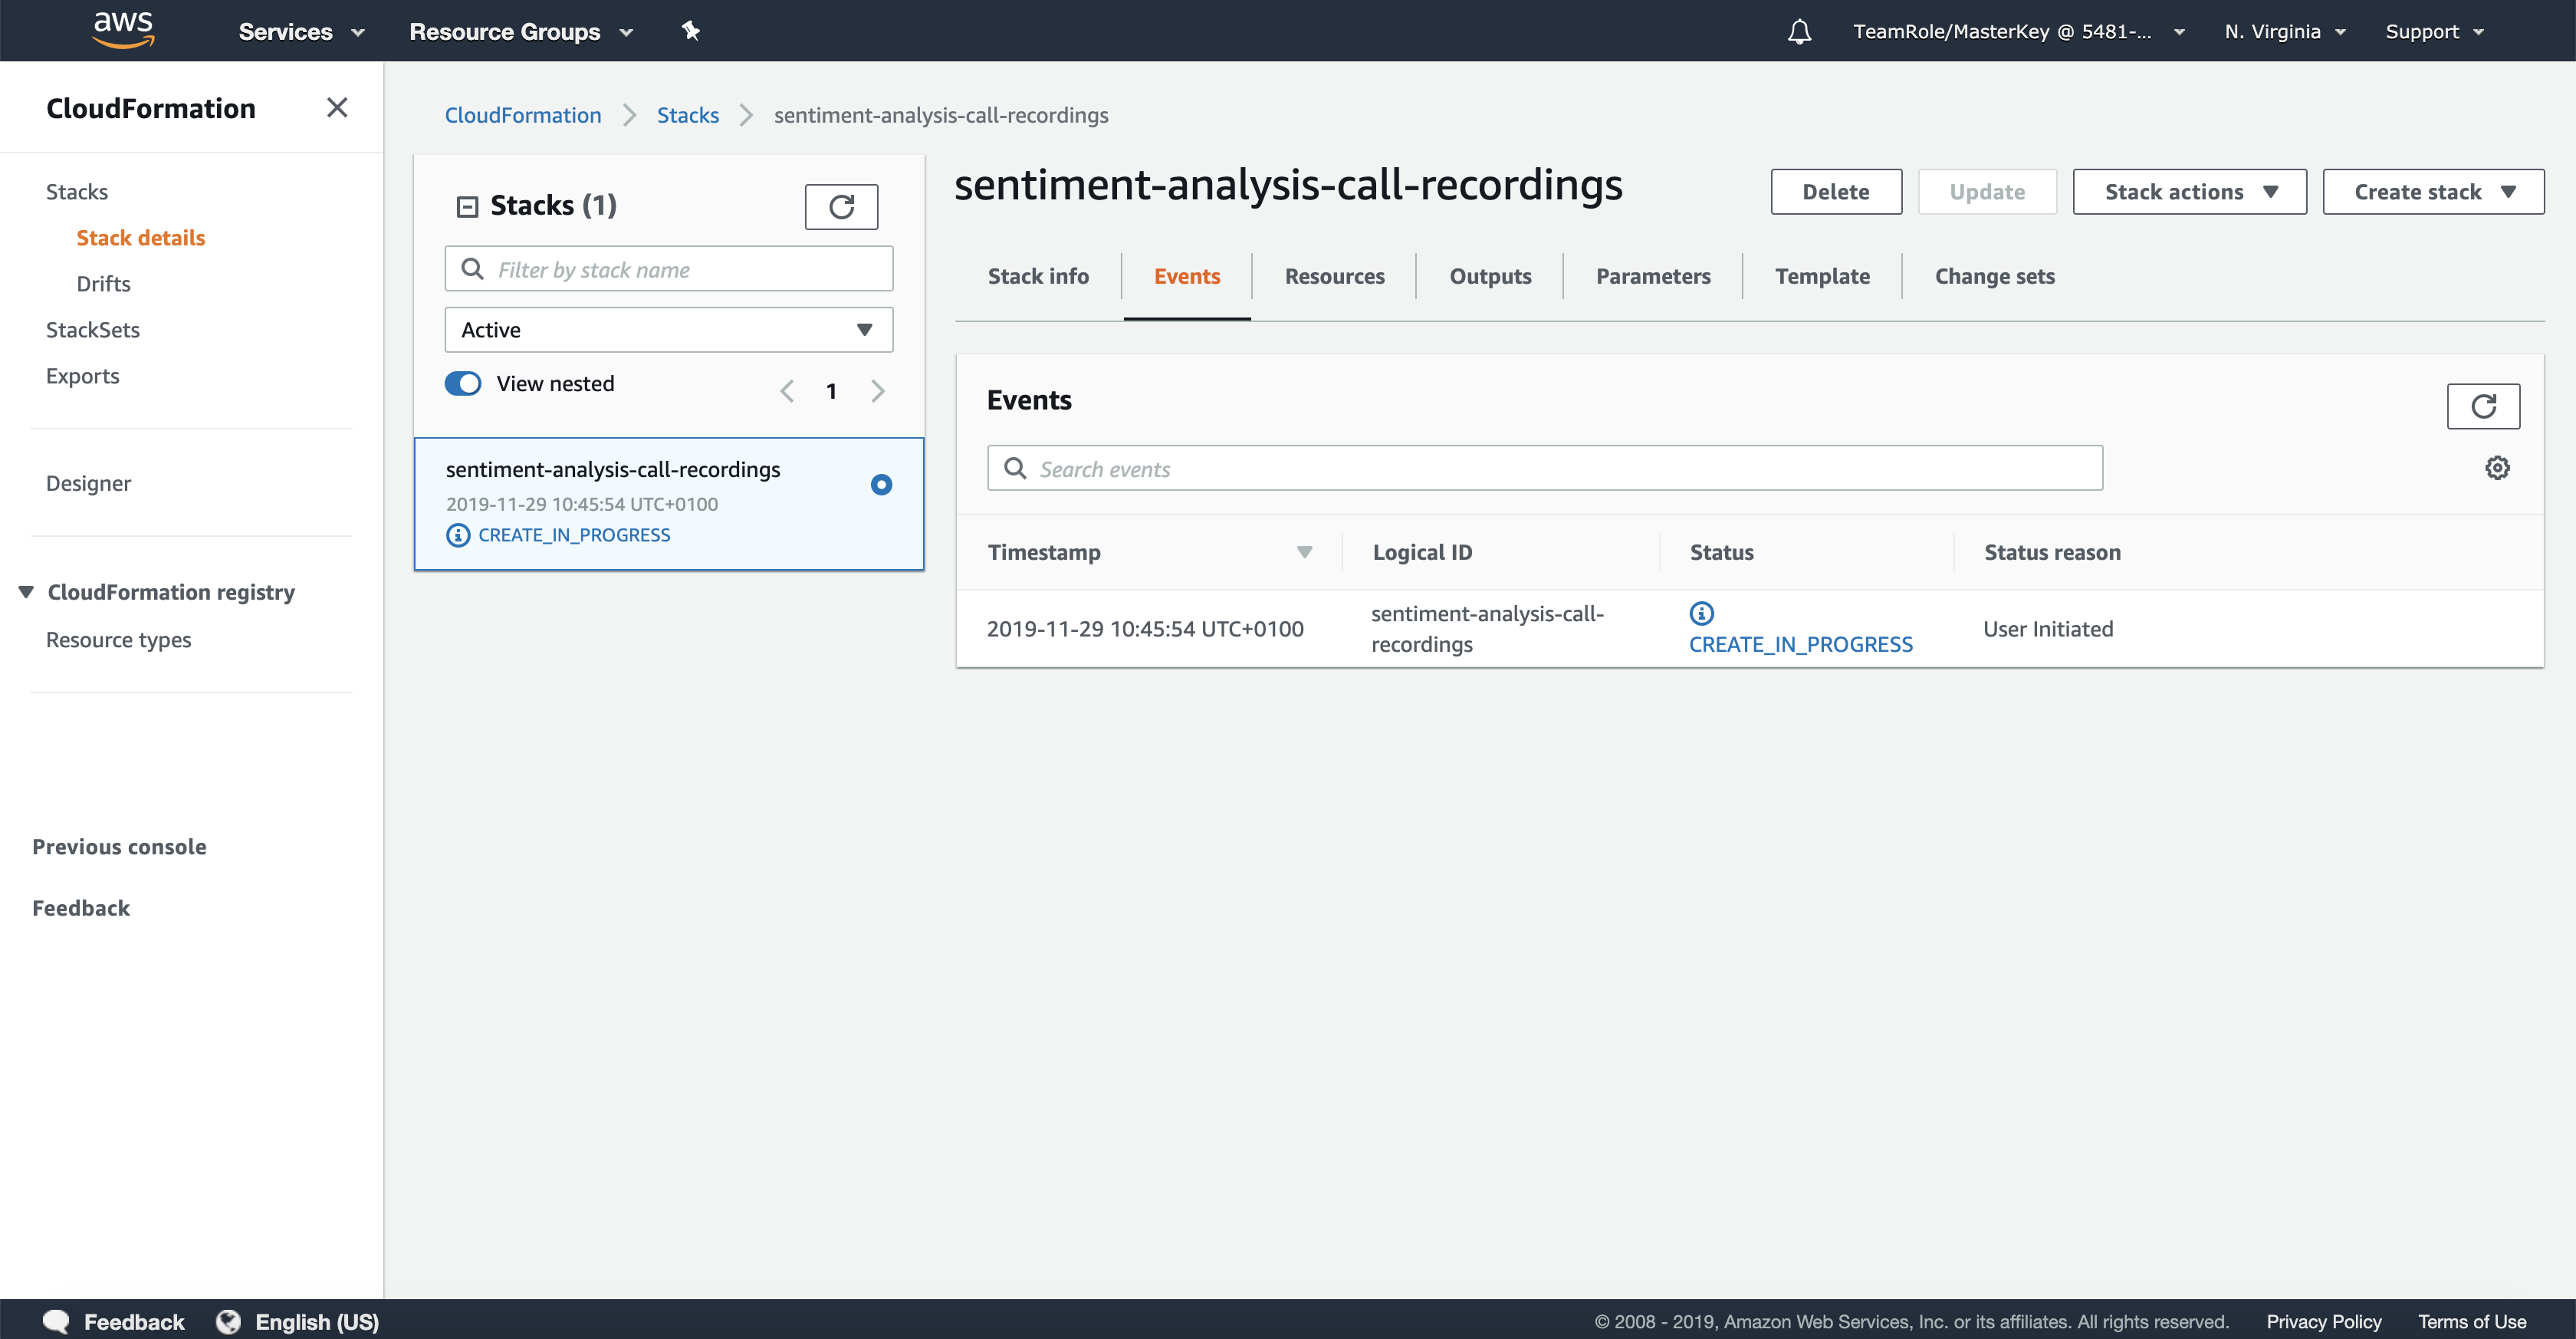
Now you get back to the overview of stacks and see that your stack is being created. Give it about two minutes to complete.
When it’s done, you will see the status in the overview box change to
CREATE COMPLETE. In theEventslist view in the right half of the screen, you will probably seeNew events availablenext to the reload button.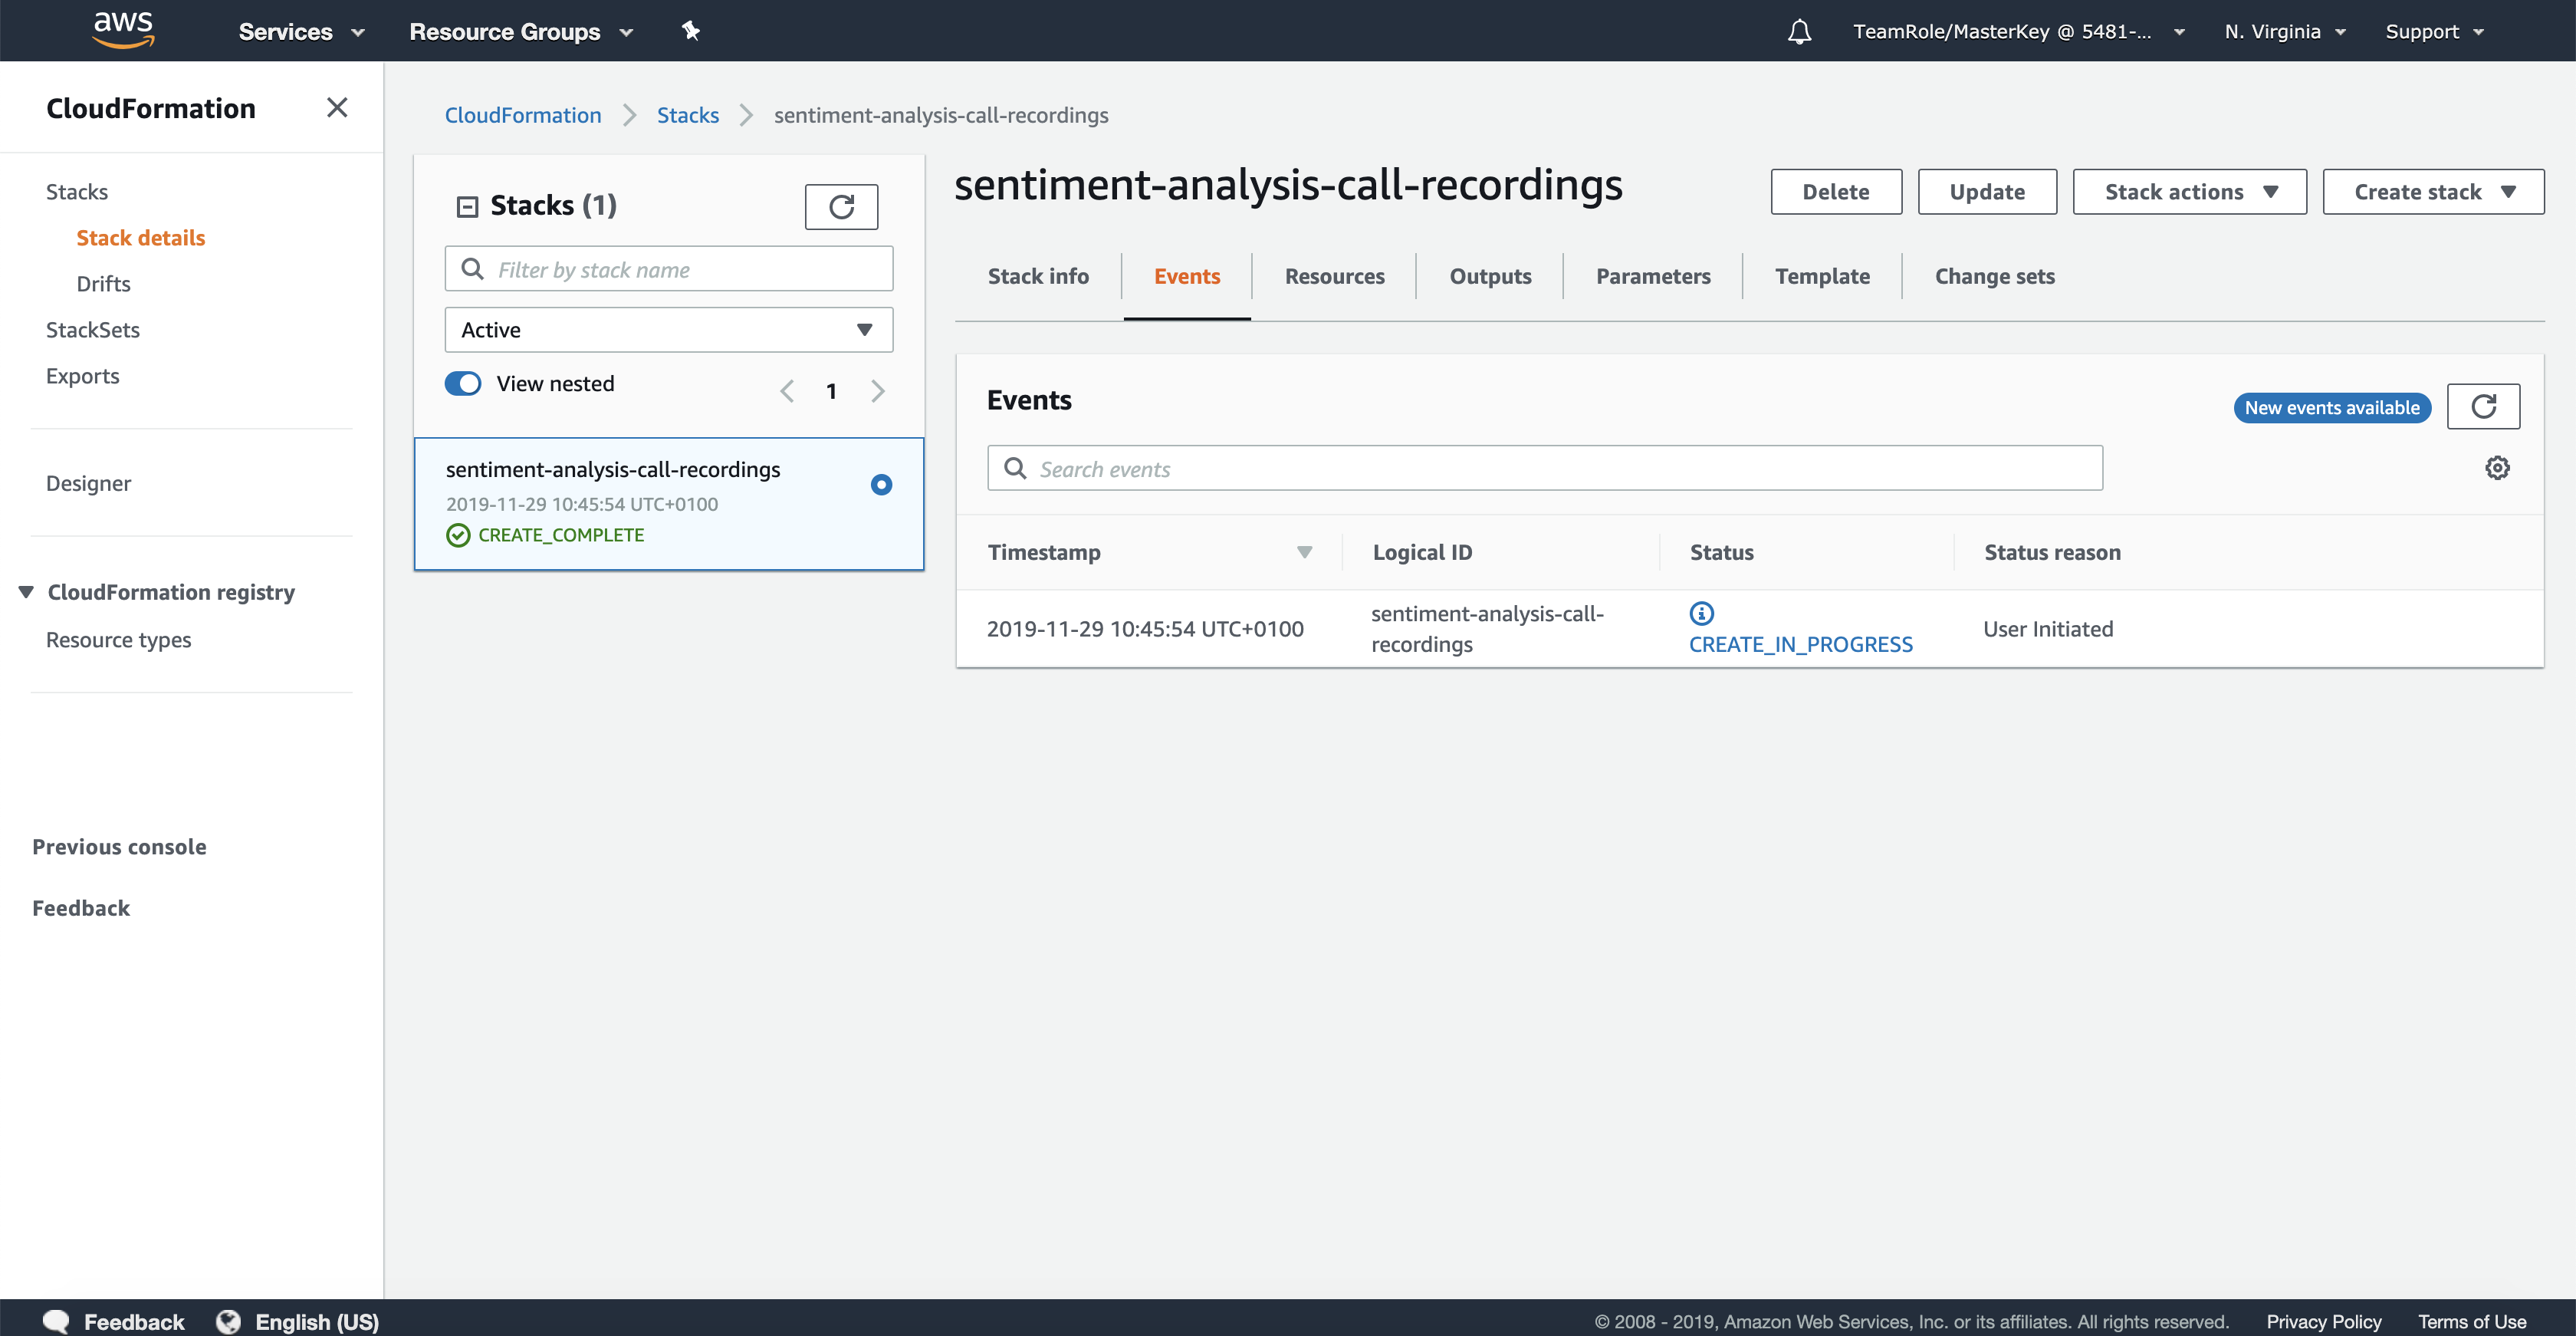
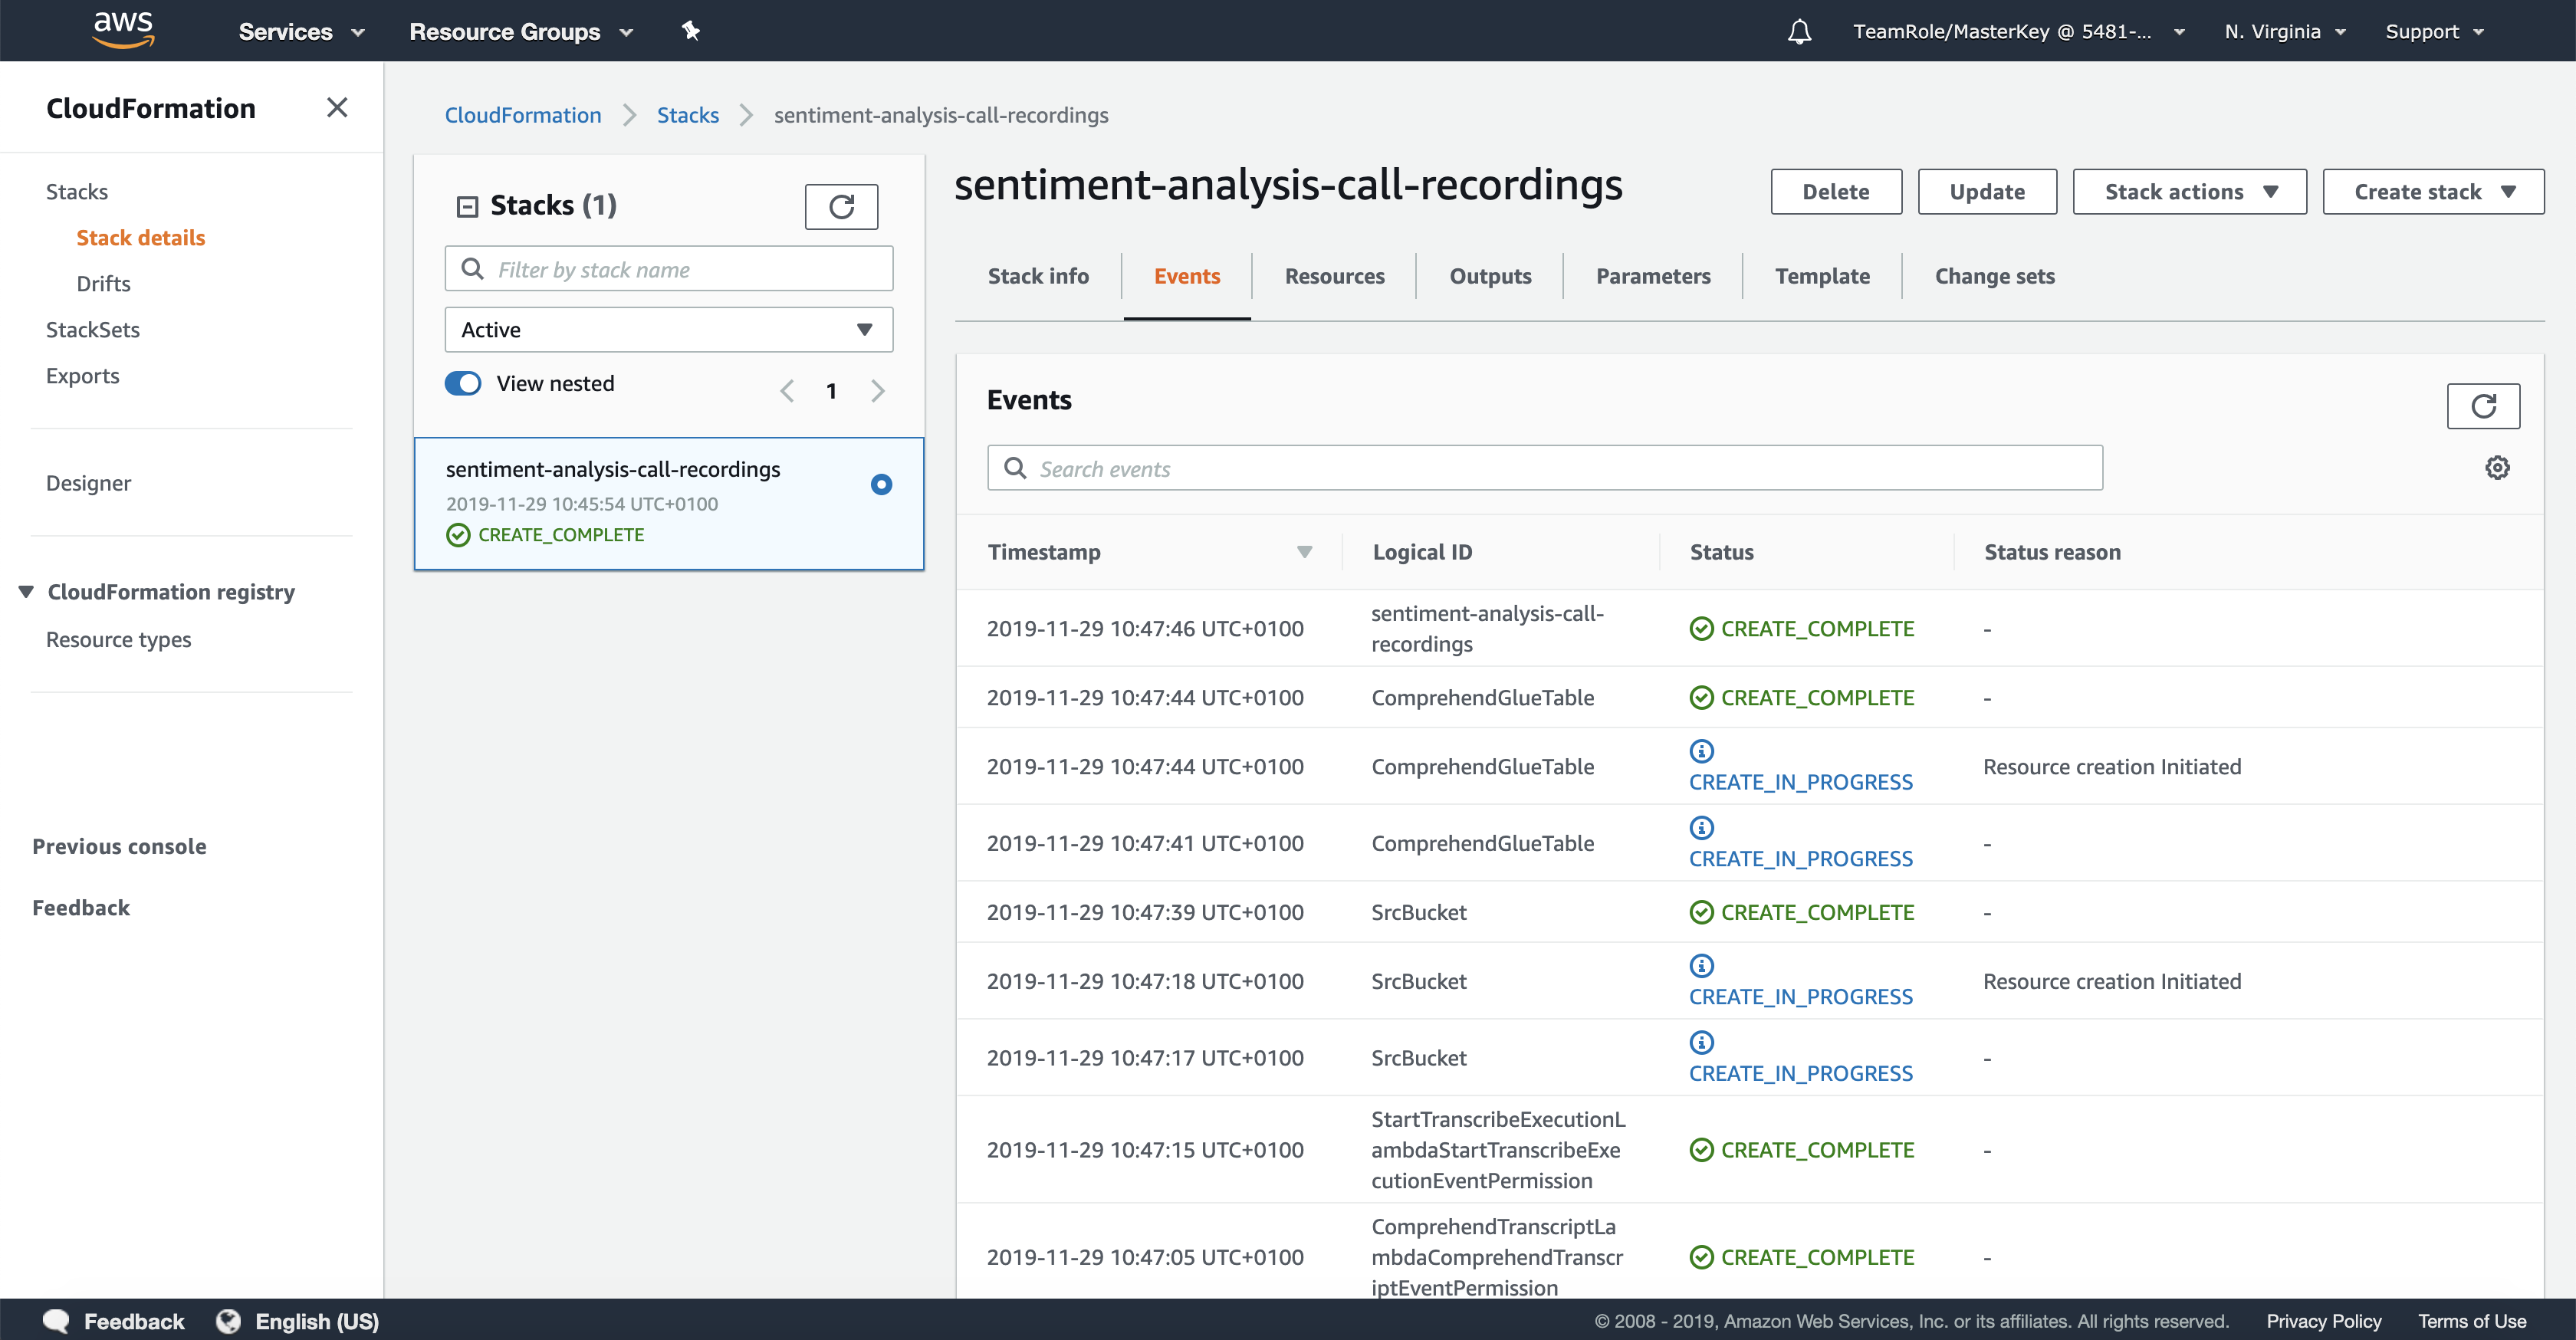
When you click on that button, you will also see the full list of events that were part of creating the stack.
In the following section, we will upload a call recording into our processing bucket and explore what happens.